Setting up Backup Impreza for Linux Servers
First Login
1- Once your payment is done, you'll receive an Email from us
2- In this Email you'll get the Backup login URL
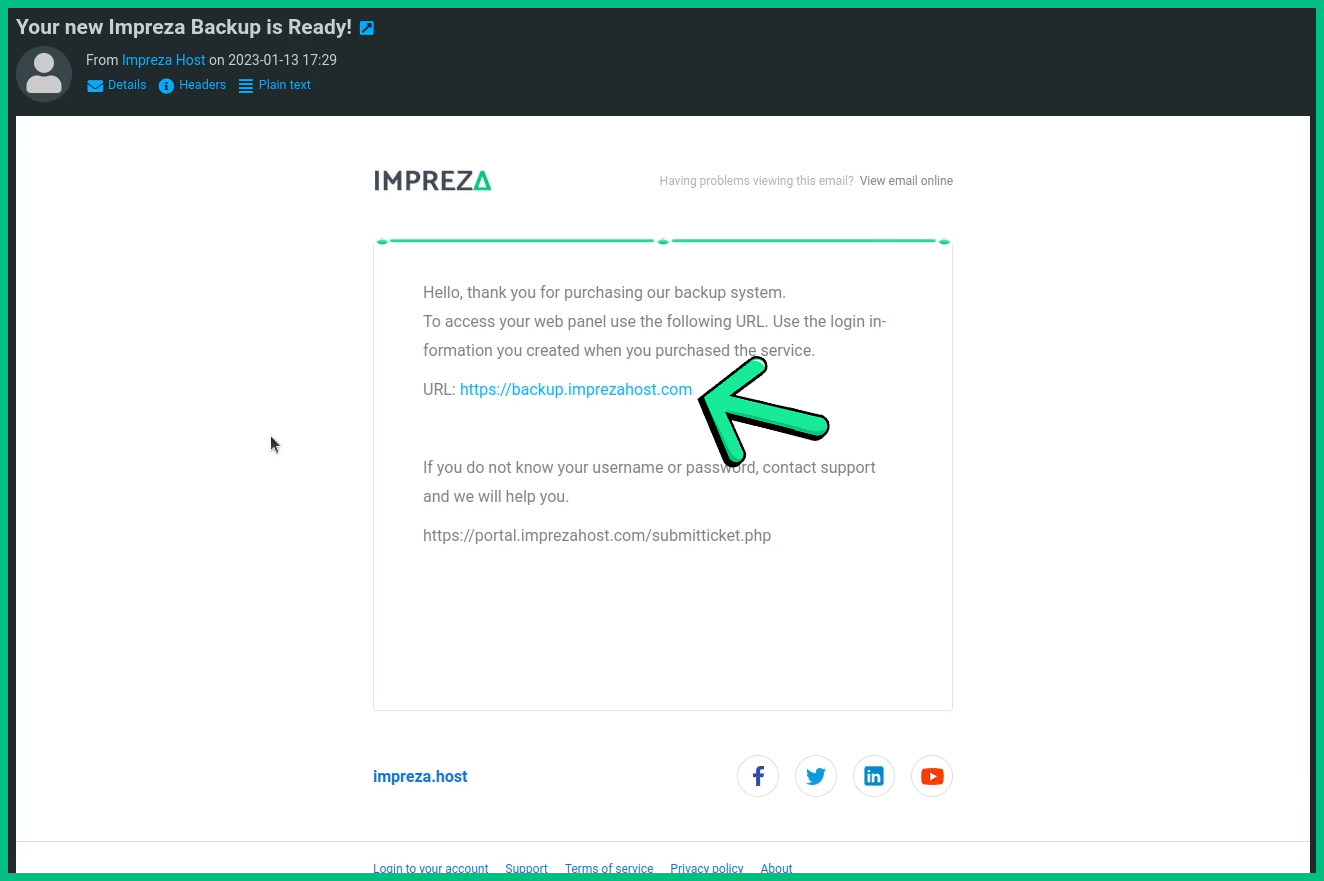
3- Open the link then use the user and password you created when you bought the service to login
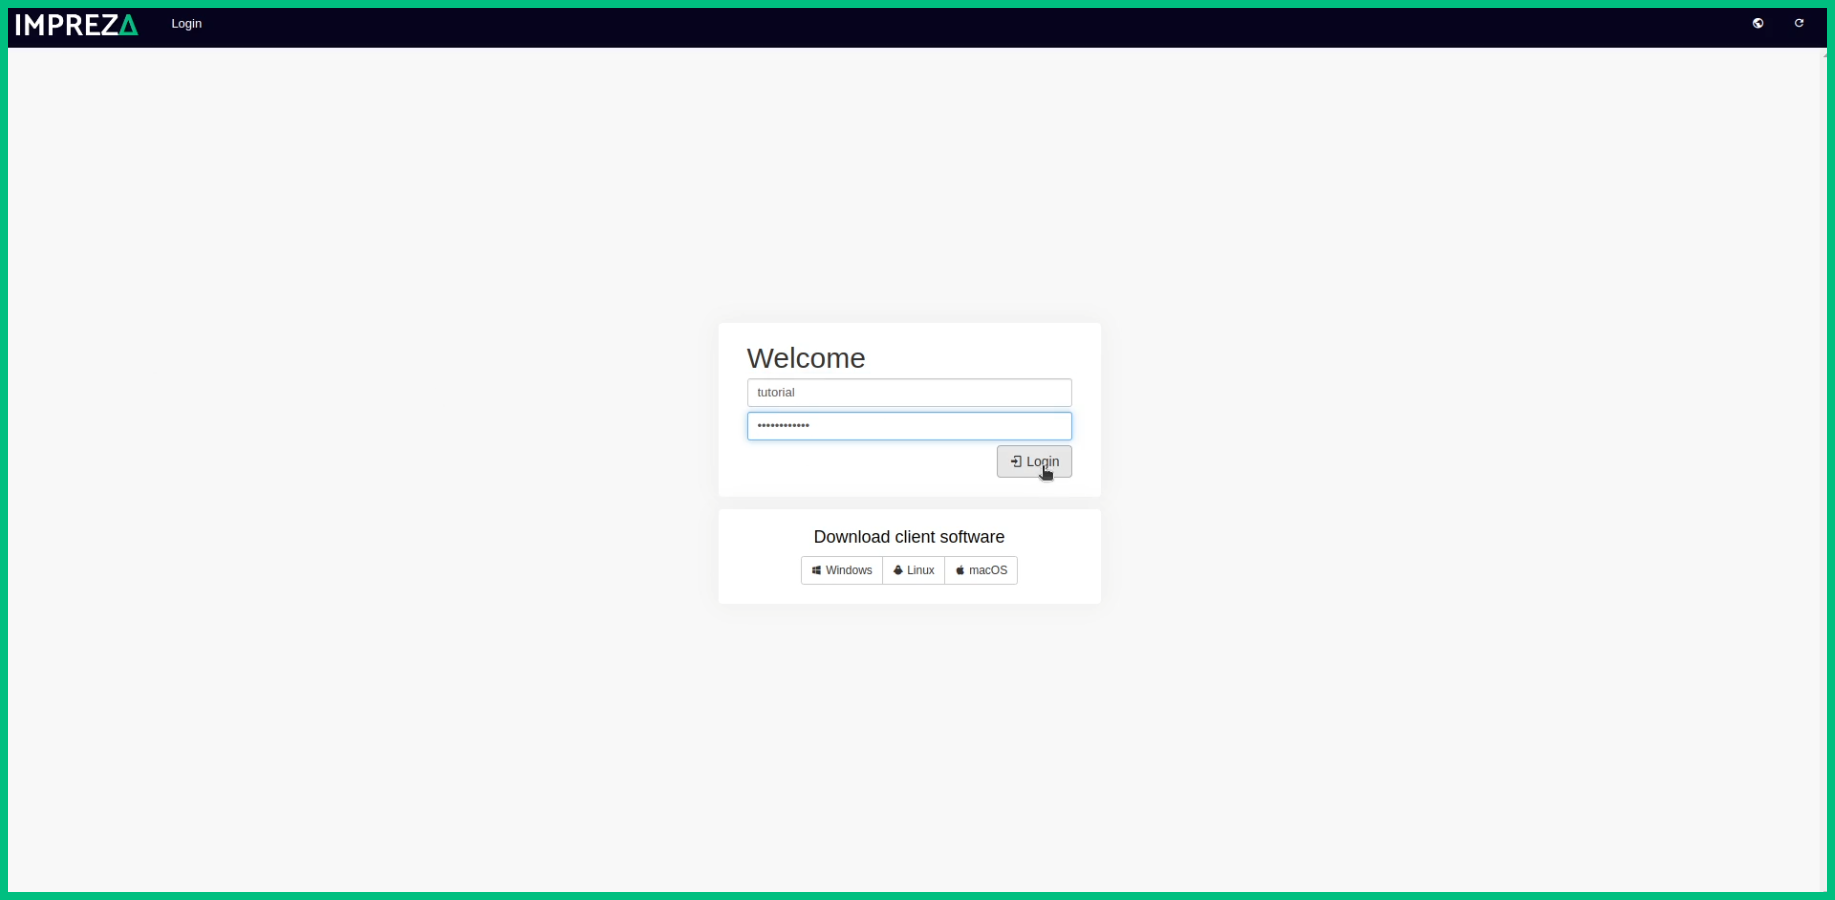
4- And this is it, that's the Backup Panel

5- Here you can see all information about your storage, set your devices, and get the desktop app
Installing the Backup for Server
1- To download the app for the server, go to the Download Client Page

You can click on any of these options
2- Here you'll have a few options for the OS, we'll install it directly into the server

3- To install directly in the server, click copy as "wget" or as "cURL"

4- Now you need to connect to your Server
5- Once connected, paste the code you copied from the download page, then press "Enter" to proceed

6- When the download of the Backup is done, type these codes to install it
chmod +x Impreza_Backup-Version.run
./Impreza_Backup-Version.run

Note: These codes may change depending on the version you're using
7- Once done, the Backup will automatically be installed
8- When the installation is done you'll need to log in to it

For the "Server URL" just press "Enter" to proceed
9- Done that, now choose a name for your Device and that's it

Backing up your Machine
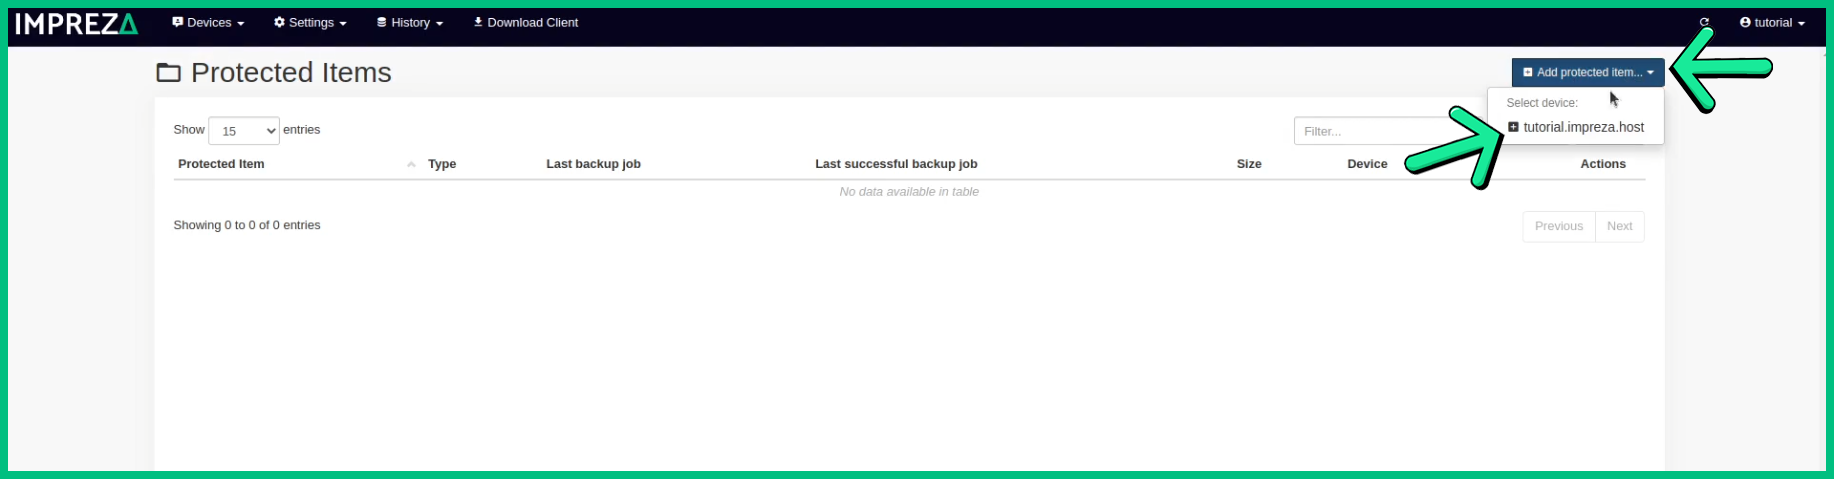
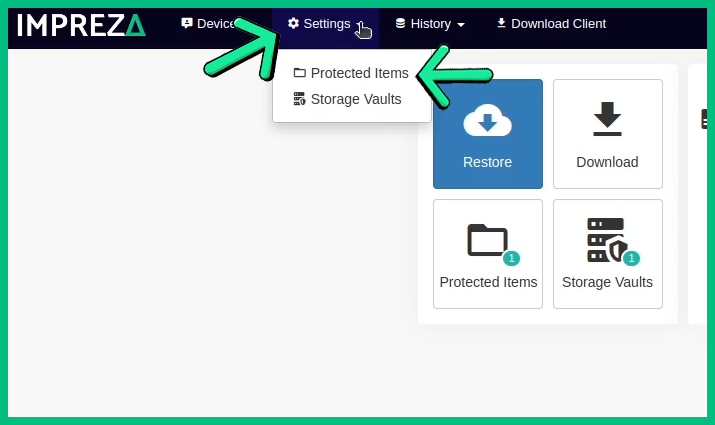
1- To backup your Devices, within the Backup Page, click on "Settings" then "Protected Items"

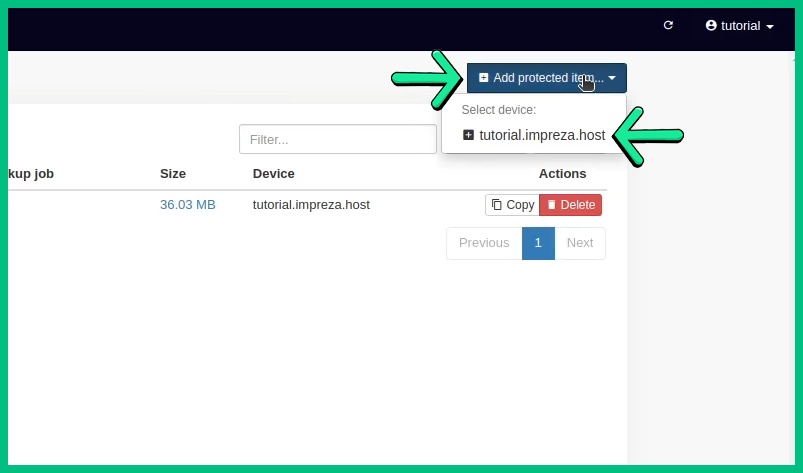
2- Click on "Add protected Item" then choose your Device
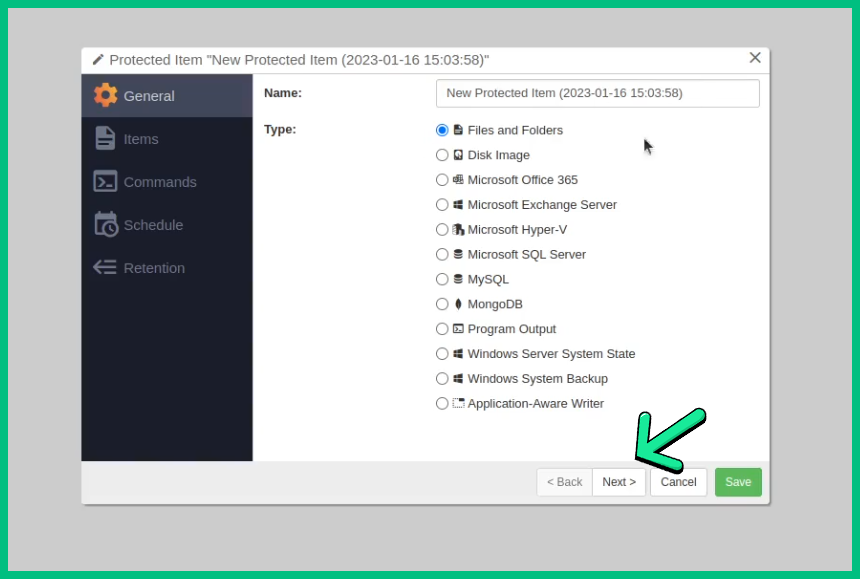
3- Here select what you want to backup, when you're done, click on "Next"
4- Now click on the "+" button and type the path for the files you want to backup

Note: You can type just a "/", it'll make all files from the server being backed up
5- Done that, click on "Next" to proceed
6- If you want a more custom setup, you can check it out all the options you have here
7- When you get to the final step, click on "Save"
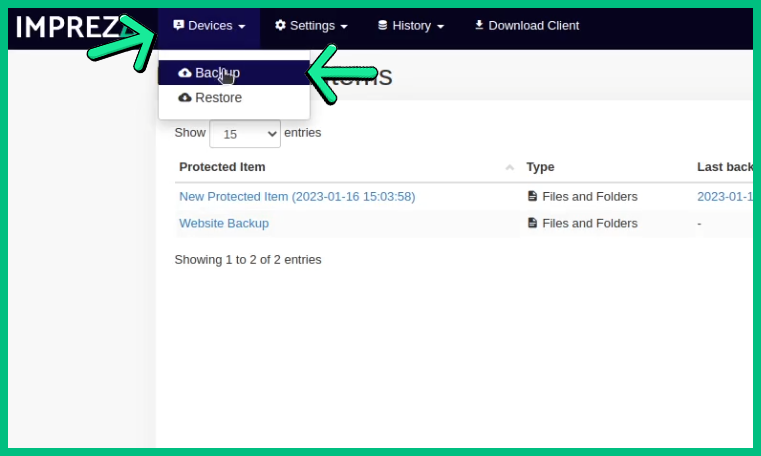
8- That done, now click on "Devices" then "Backup"

9- Here you can choose your Device and Schedule which Device it will backup
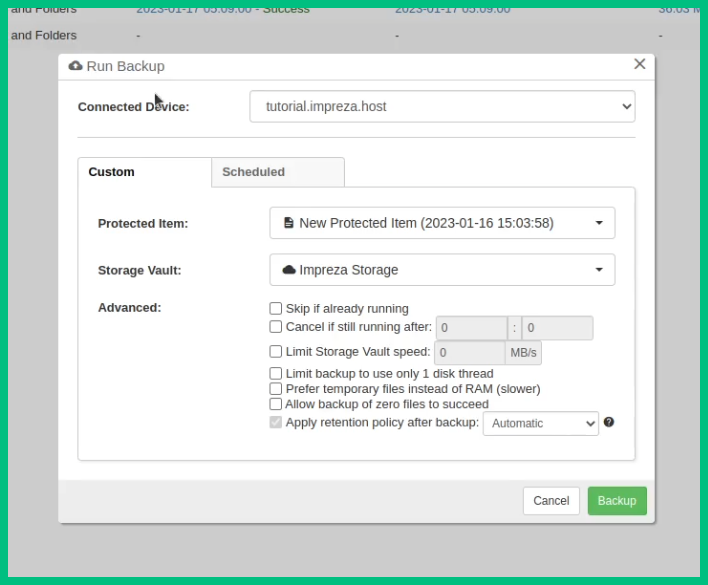
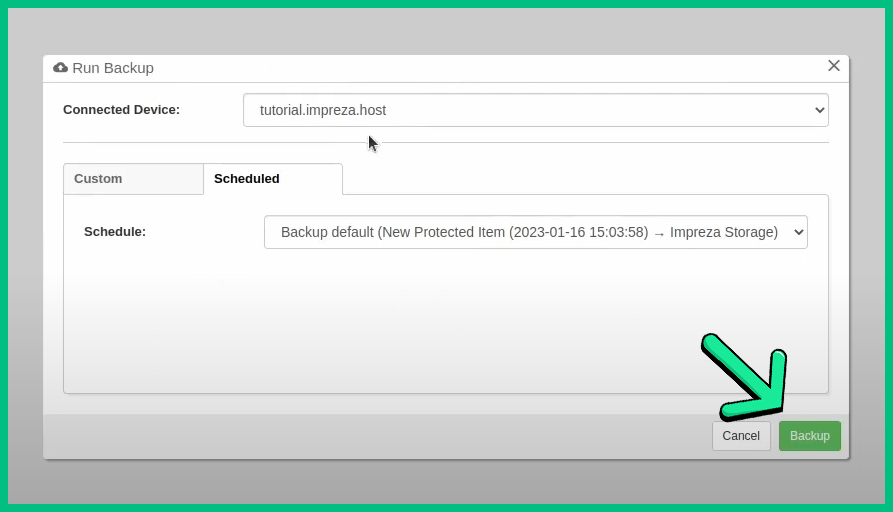
10- Once done, you can just click on "Backup" and that's it, the software will backup your machine automatically
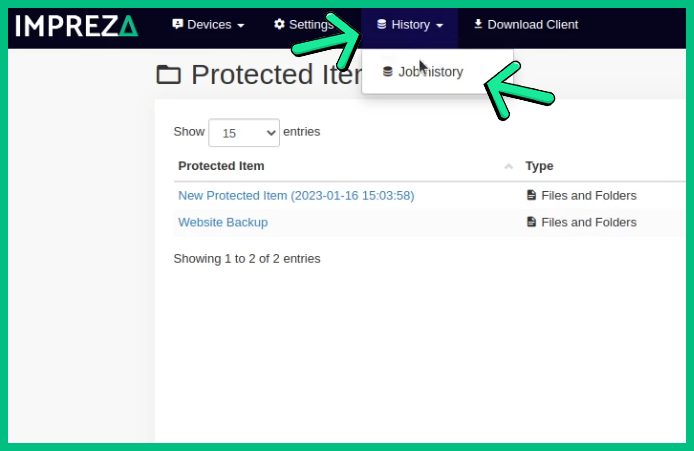
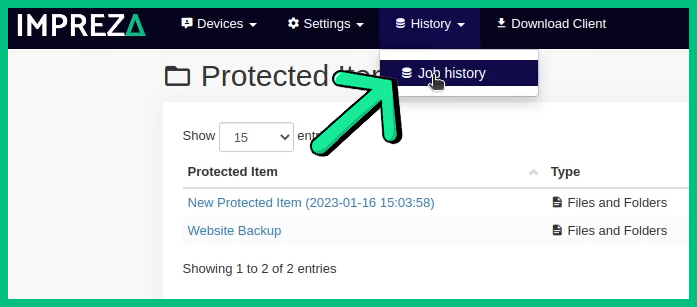
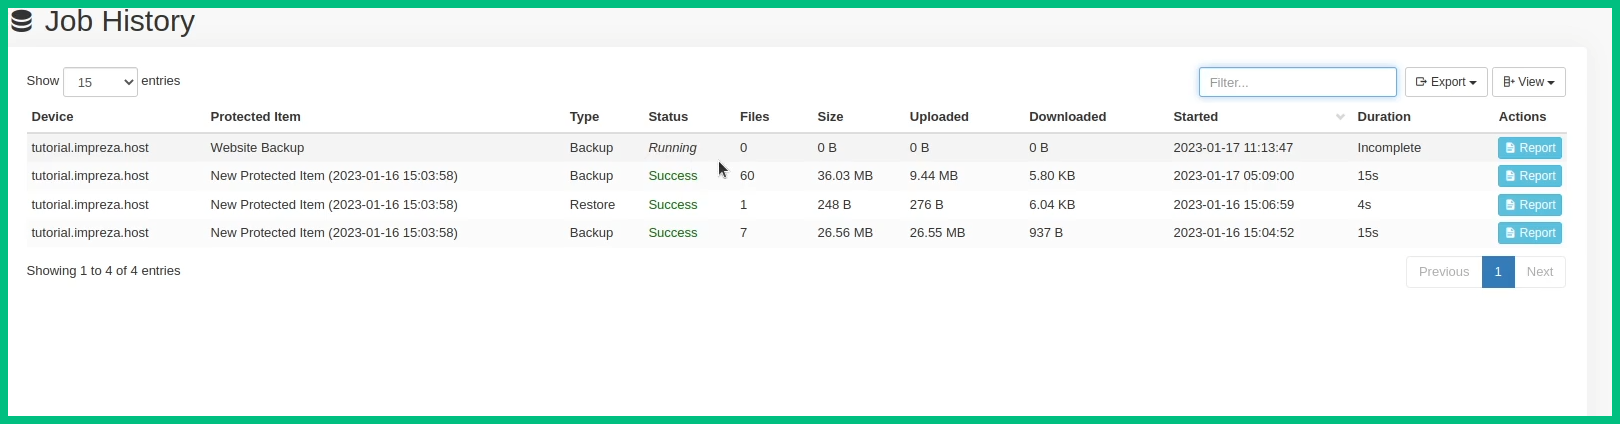
11- You can click on "History" to see your Backup running
Backing Up your Website
1- Within the Backup page, click on "Settings" then "Protected Items"
2- Now add a new Item by clicking on "Add protected Item" and then choose your Device
2- Now, click on "Next" to proceed

Note: You can type a different name for your backup
3- Now, click on the "Plus" button, then paste the Website Files Location

Note: If you prefer, you can type just a "/", it'll backup all files from your server
Usually, the website files are within the "/www"
4- That done, now just click on "Save" to proceed

5- Now, click on "Devices" then "Backup"
6- Here select the Website Item we created, then click on "Backup"

7- And that's it, your backup will run
8- If you want, click on "History" to see your backup running