How to Add Private Nameservers in WHM/cPanel for Your Domain
Step by Step:
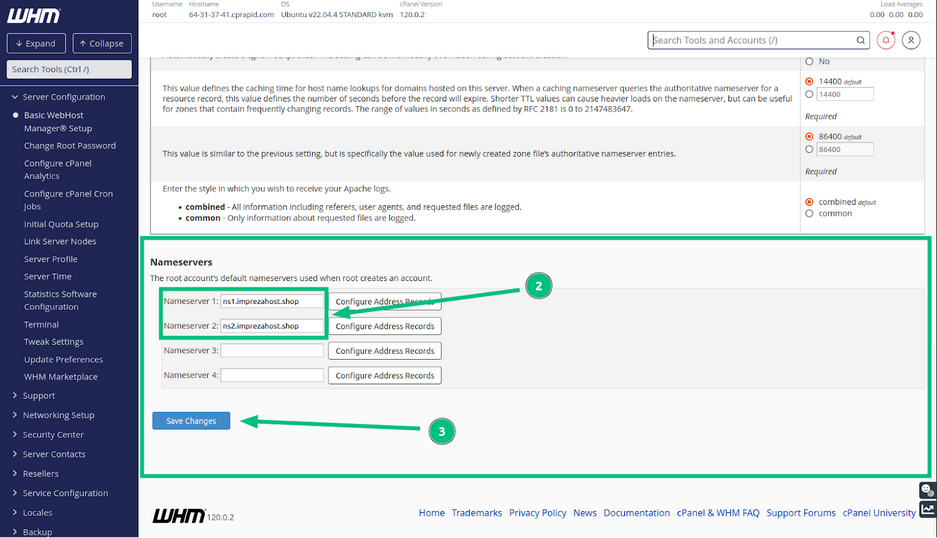
- Configure WHM:
- Access WHM as an administrator.
Navigate to Server > Server Configuration > Basic WebHost Manager Setup.

- In the Primary nameserver and Secondary nameserver fields, enter the names of your private nameservers:
ns1.example.com.
ns2.example.com.
- Save Changes.
- Edit DNS Zone Manager.
- Navigate to the DNS Zone Manager area and click edit on the SOA record.
- Edit the Mname field with ns1.example.com.
- Save Record.

- Edit the two NS fields below with the new private nameserver information and save the changes.


- Register Your Private Nameservers:
- Access your Impreza domain control panel.

5 - Locate the DNS or DNS Management section.
- Remove the existing nameservers and add the following nameservers:
Name: ns1.example.com
IP Address: [Insert your WHM server's IP address]
Name: ns2.example
IP Address: [Insert your WHM server's IP address]

- Point Your Domain to Your Private Nameservers:
Wait for the DNS changes to propagate (may take up to 24 hours).
Verify that your domain is pointing to your private nameservers using an online DNS checker, such as https://dnschecker.org/.

Notes:
Replace [Insert your WHM server's IP address] with the actual IP address of your WHM server.
If you are unsure of your WHM server's IP address, you can find it in the WHM interface under Server > Server Information.
The DNS propagation process can take up to 24 hours. During this time, your website may be unavailable to some users.
Additional Resources:
cPanel documentation on configuring nameservers: https://docs.cpanel.net/knowledge-base/dns/how-to-set-up-nameservers-in-a-cpanel-environment/
