The following article will guide you through configuring your email on an Android device, iOS device, Blackberry device, Windows Mobile etc.,
Before you start, be sure you have the following handy:
Your domain name: example.com
Your email address: [email protected]
Your email account password.
1. CONFIGURE YOUR MAIL ACCOUNT ON ANDROID MOBILE DEVICE:
- Android's default Email Client is the Gmail application. Launch the Gmail Application and in Settings, click on Add Account. Select Other.

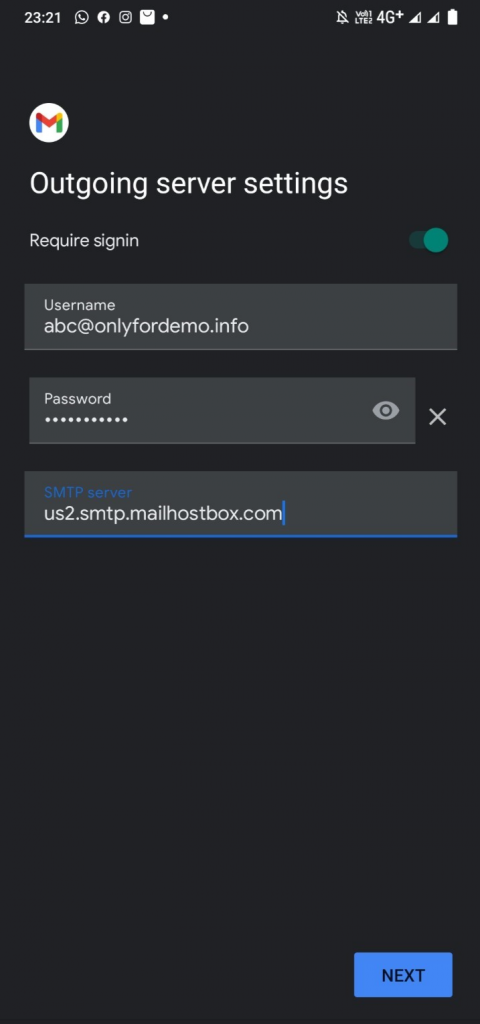
2. Enter your Email Address (the one you got from us) for your purchased Email Hosting package and click on Manual Setup.

3. Select the required incoming protocol, POP or IMAP, depending on your requirements. Here, we have used IMAP.

4. Enter the password of your email account.

You can use SSL or Non-SSL settings.
SSL/TLS settings:
Incoming mail server Settings:
IMAP
Server: us2.imap.mailhostbox.com
POP
Server: us2.pop.mailhostbox.com
Outgoing mail server Settings:
SMTP
Server: us2.smtp.mailhostbox.com.
NON-SSL/TLS settings:
Incoming mail server Settings:
IMAP
Server: imap.domain.tld
POP
Server: pop.domain.tld
Outgoing mail server Settings:
SMTP
Server: smtp.domain.tld
6. Leave the default settings checked and click Next.

7. Give a name to your account for your reference. This is optional.

8. That’s it! Your account is now ready to use. You can check the Inbox and start composing new emails.

2. CONFIGURE YOUR MAIL ACCOUNT ON APPLE iPHONE:
To set up your Free/Business/Enterprise email account on your Apple iOS device please follow the steps below.
- Go to Settings on your iPhone and scroll down to “Mail” and click on it.

- Click on “Add Account”

- Click on “Other”

- Click on Add Mail Account.

- Enter your email address & password and click on “Next”

- You need to enter the POP/IMAP & SMTP settings manually as our default incoming and outgoing mail servers have SSL installed on them.
Note: Apple does not allow you to use your branded URL to configure the email account. You will get an error if you try to use the incoming/outgoing mail servers as mail.onlyfordemo.info. Please use only the “SSL secured” URLs.

| SSL | ||
| Server | Host | Port |
| POP | us2.pop.mailhostbox.com | 995 |
| IMAP | us2.imap.mailhostbox.com | 993 |
| SMTP (STARTTLS) | us2.smtp.mailhostbox.com | 25 or 587 |
- Click on Next and your email account configuration is now complete.

- You can now navigate back to the “Mail” app to send and receive emails.

Upon successful completion, you will be taken back to the Mail screen. Your account will now be listed in the Accounts section.
