Translator
Translator
Translator
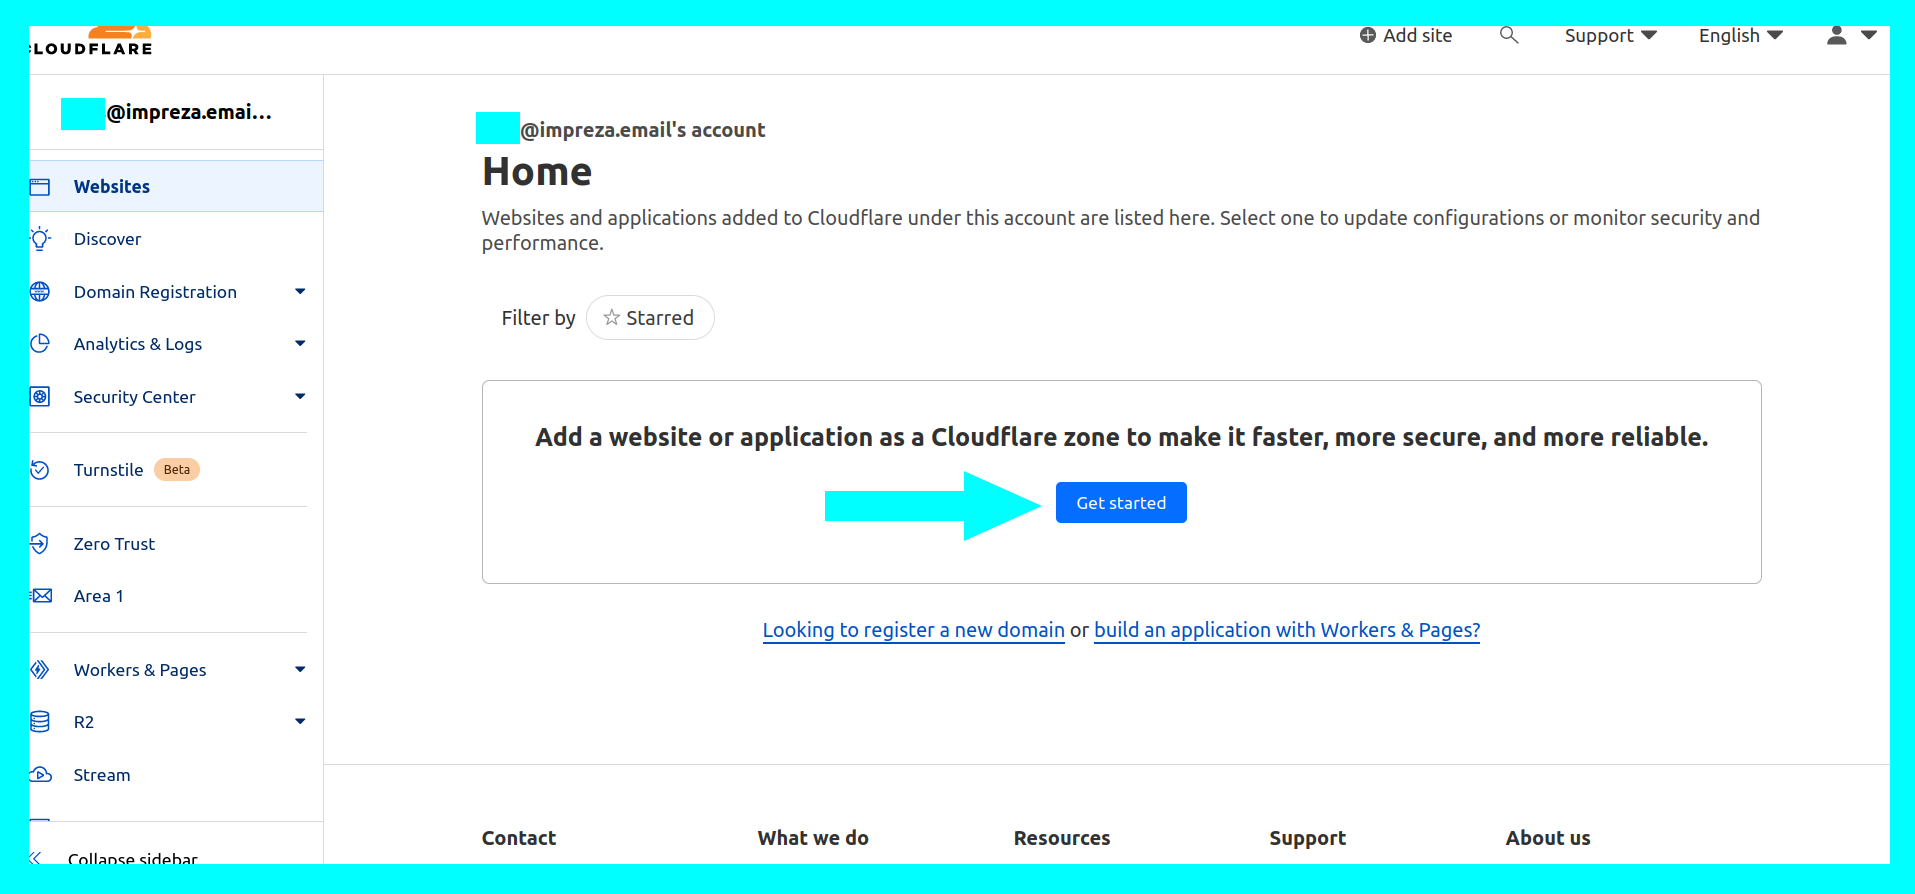
- Make your registration on the cloudflare website and after being logged in, click on get started.
2. Add your domain in the box and click Continue.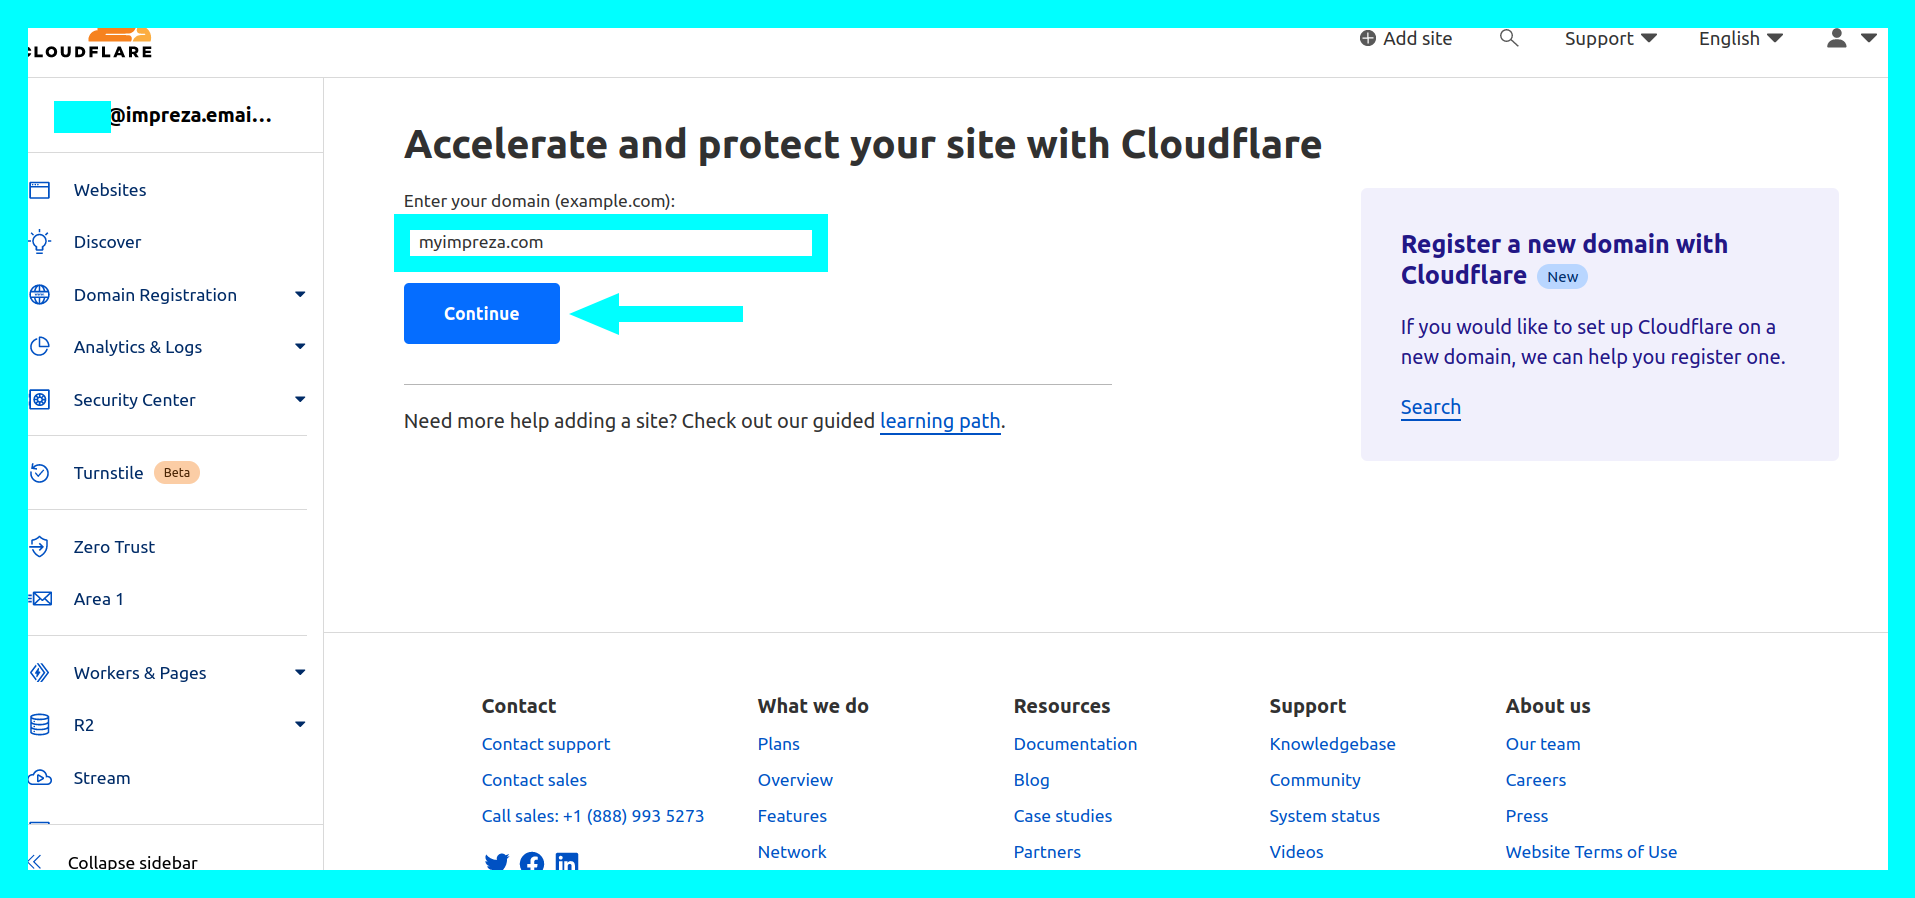
3. Choose which plan you want to use. In this tutorial I will use Free. After choosing click on Continue.

4. On the next page you will review or edit your DNS records and after that click on Continue.
*If your records were not automatically imported, you must follow this configuration process:
4.1 - Click on Add record.
4.2 - Select record A, fill in the name with @ and define the IP address of your server and then click save.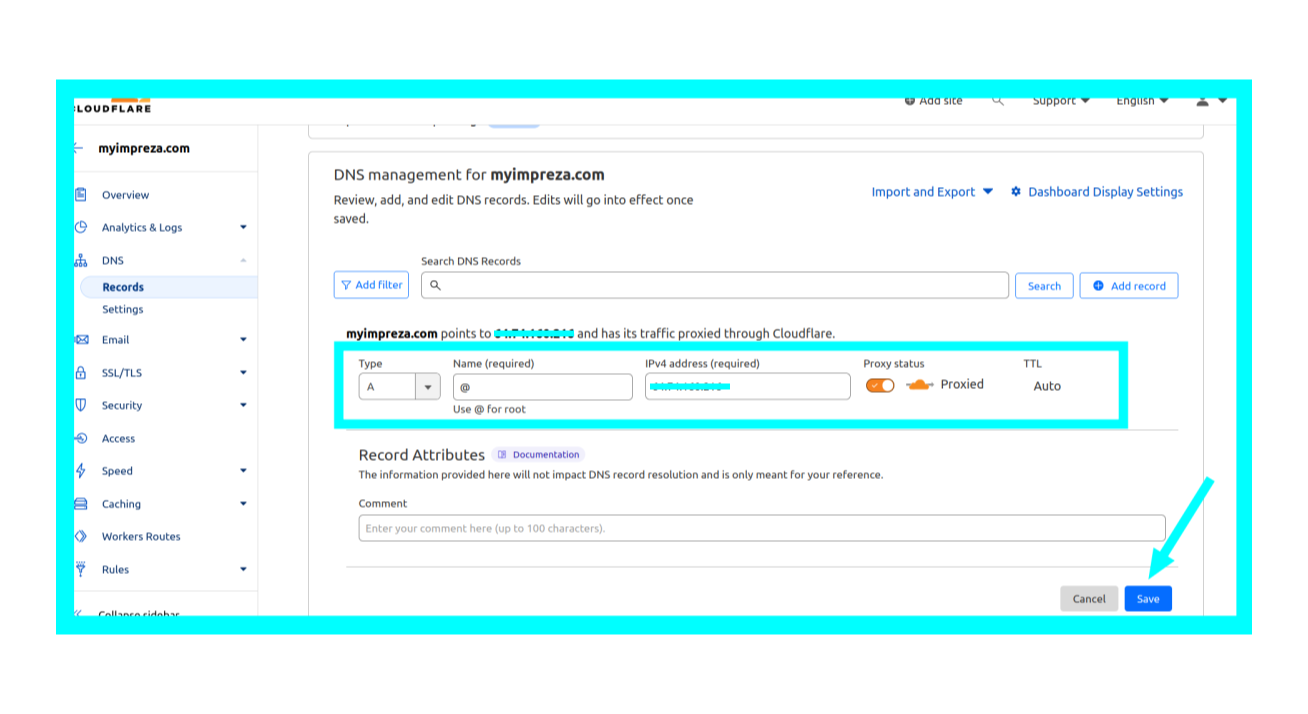
4.3 - Now select the CNAME record and fill in the name with www, and in target fill in your domain and then click save.
5. On this page you will receive the Cloudflare nameservers that you must add to the Impreza Dashboard.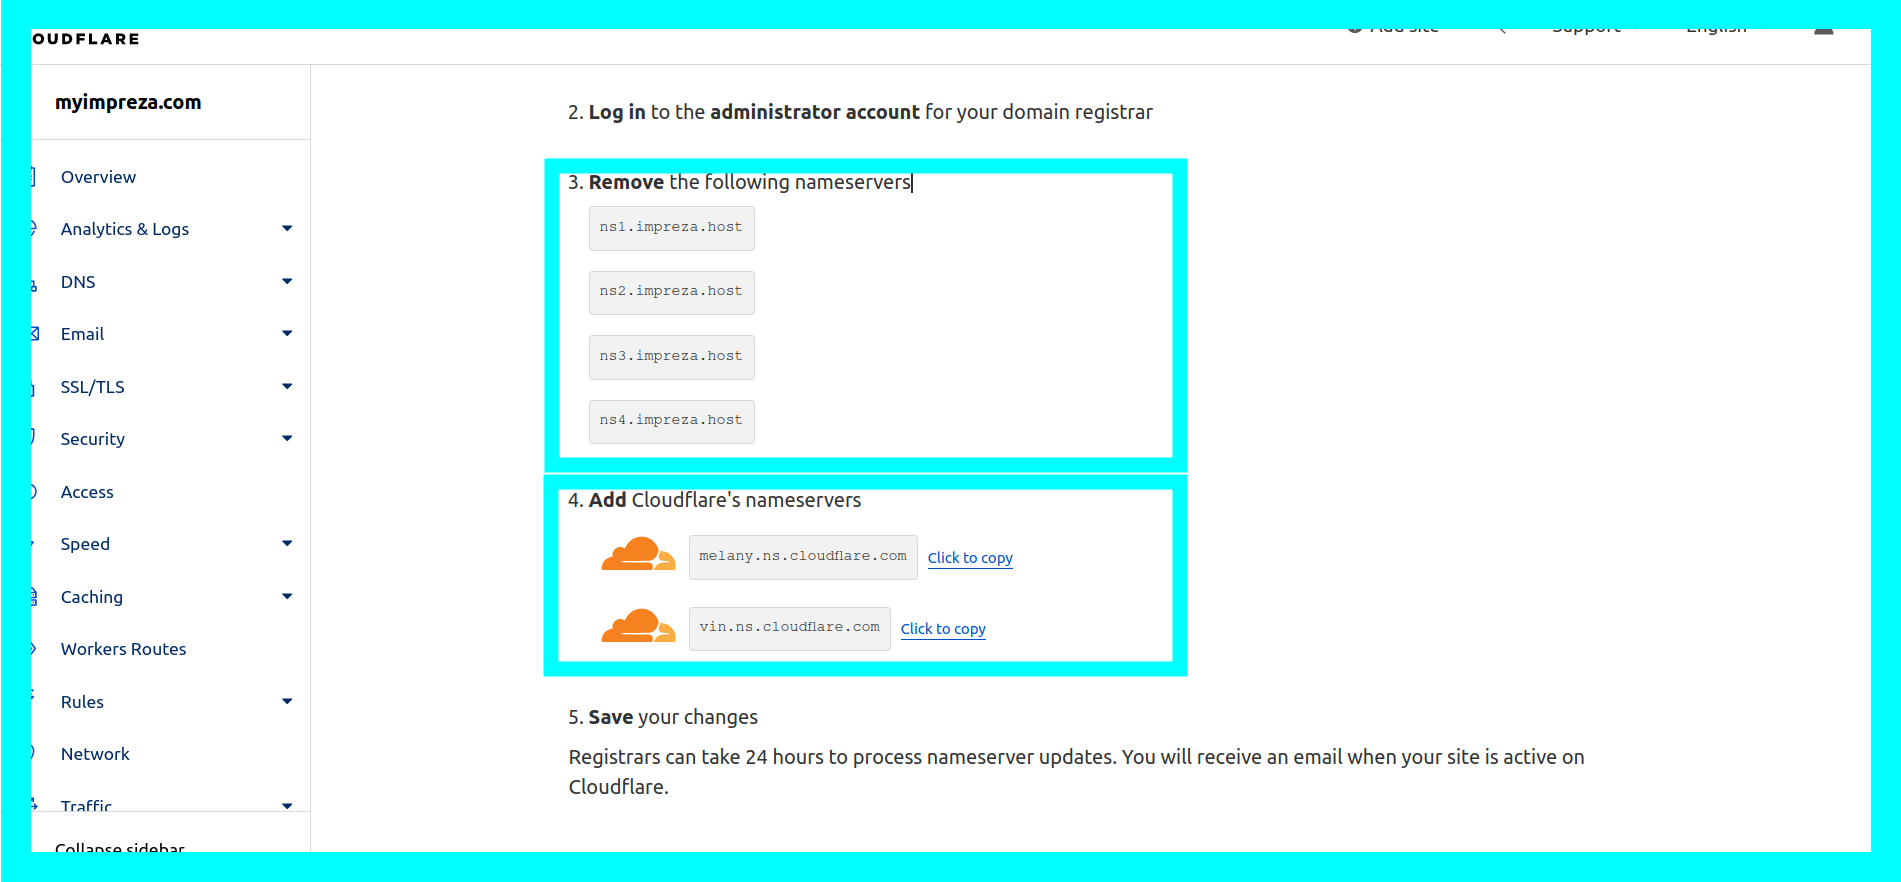
6. Open your Impreza Dashboard in another tab of your browser and click on Domains.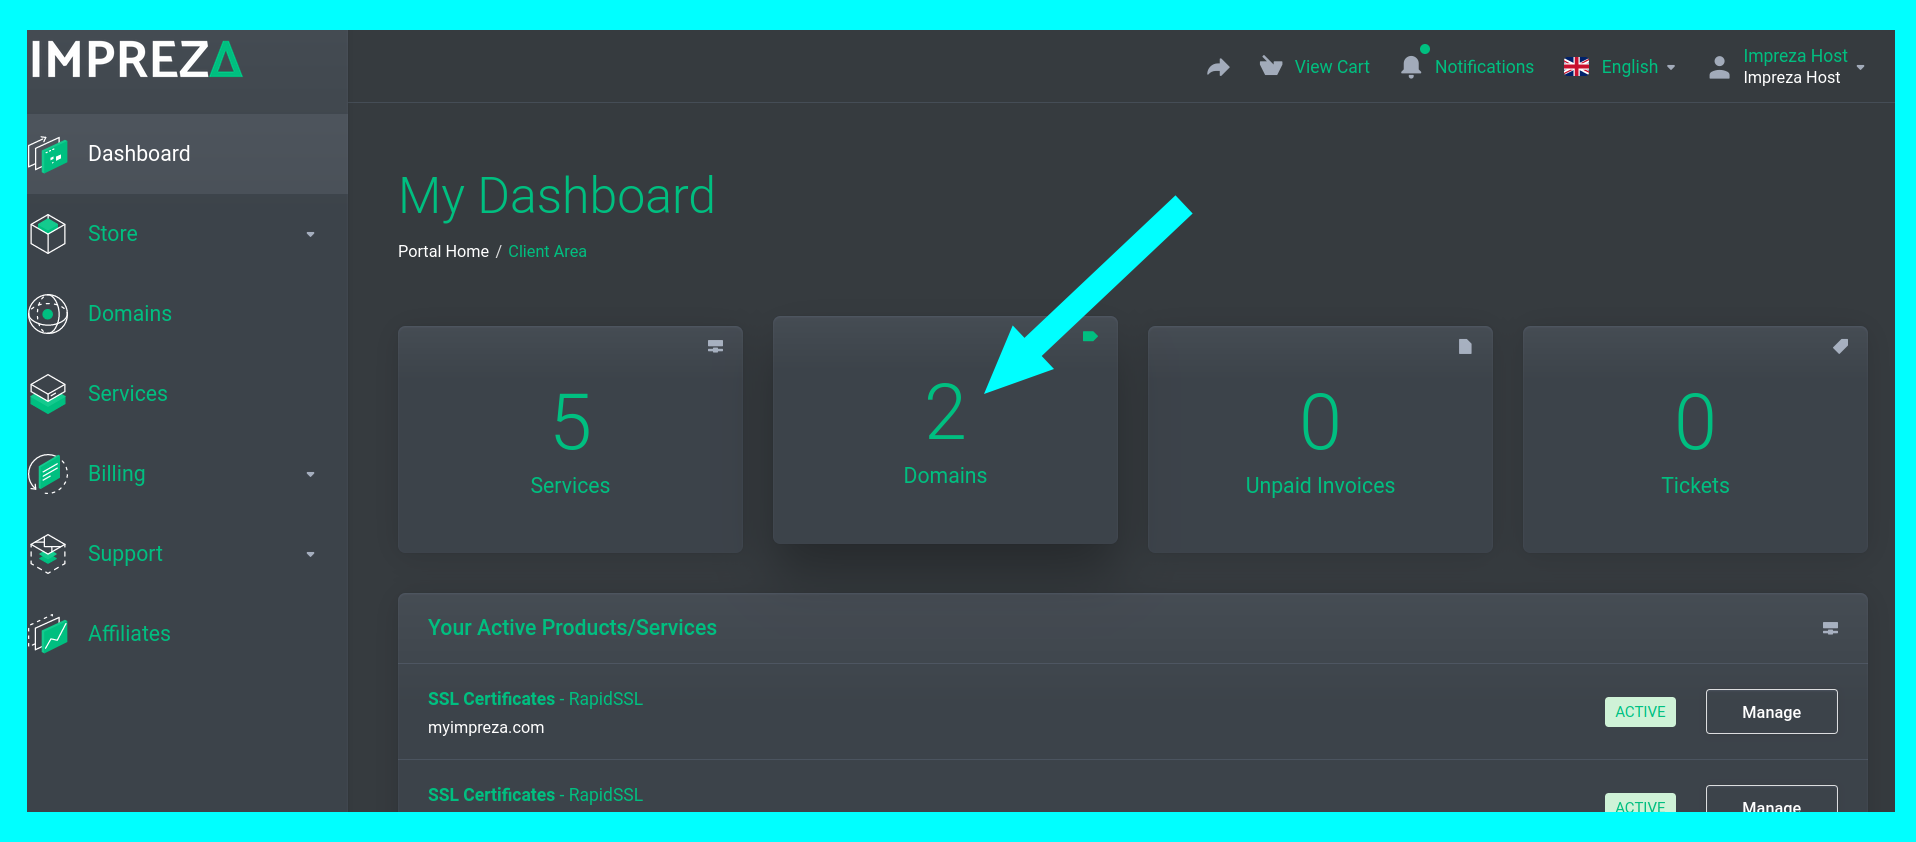
7. Click Manage on the domain you want to add cloudflare to.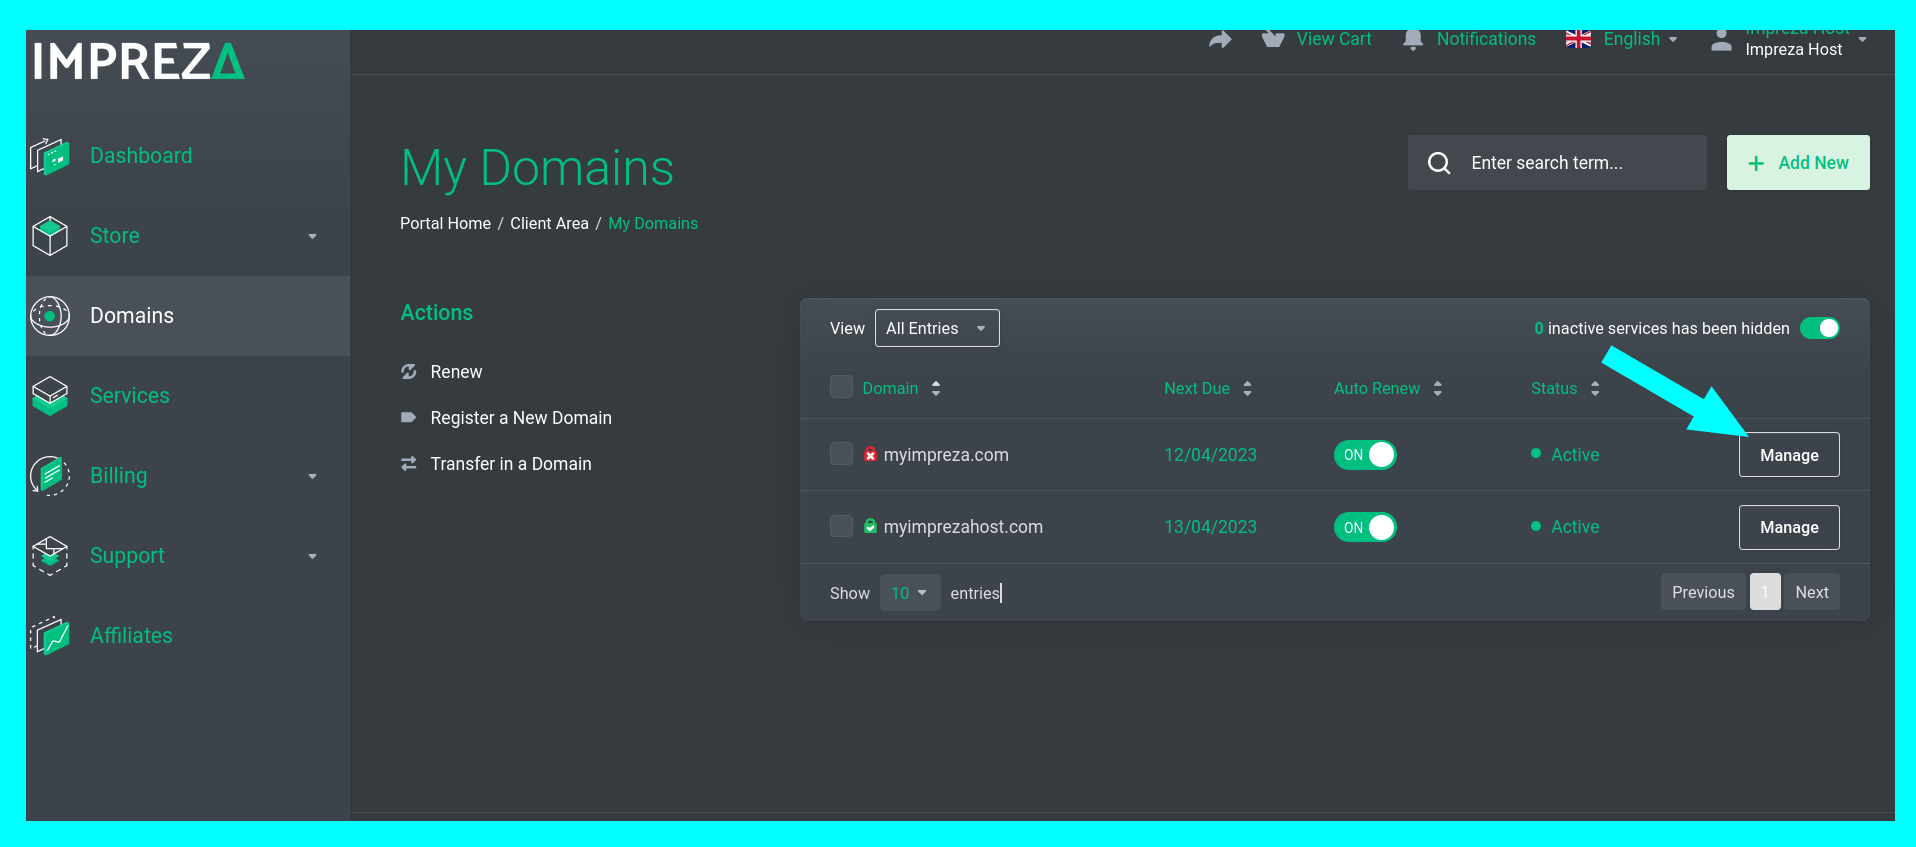
8. Click Nameservers.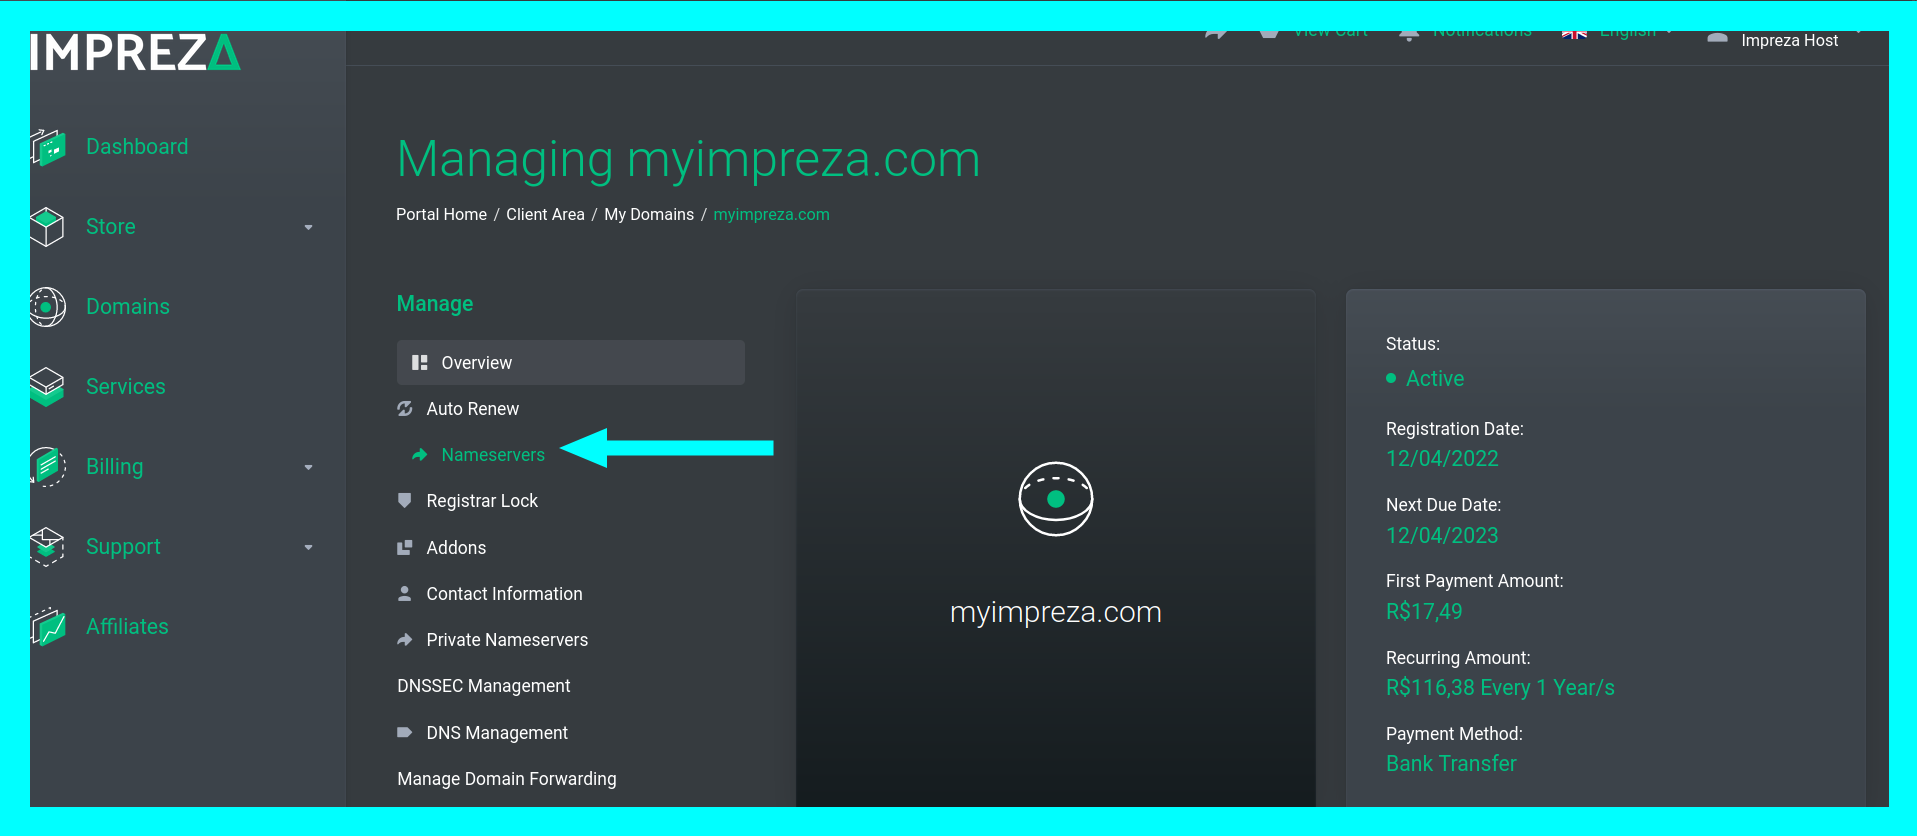
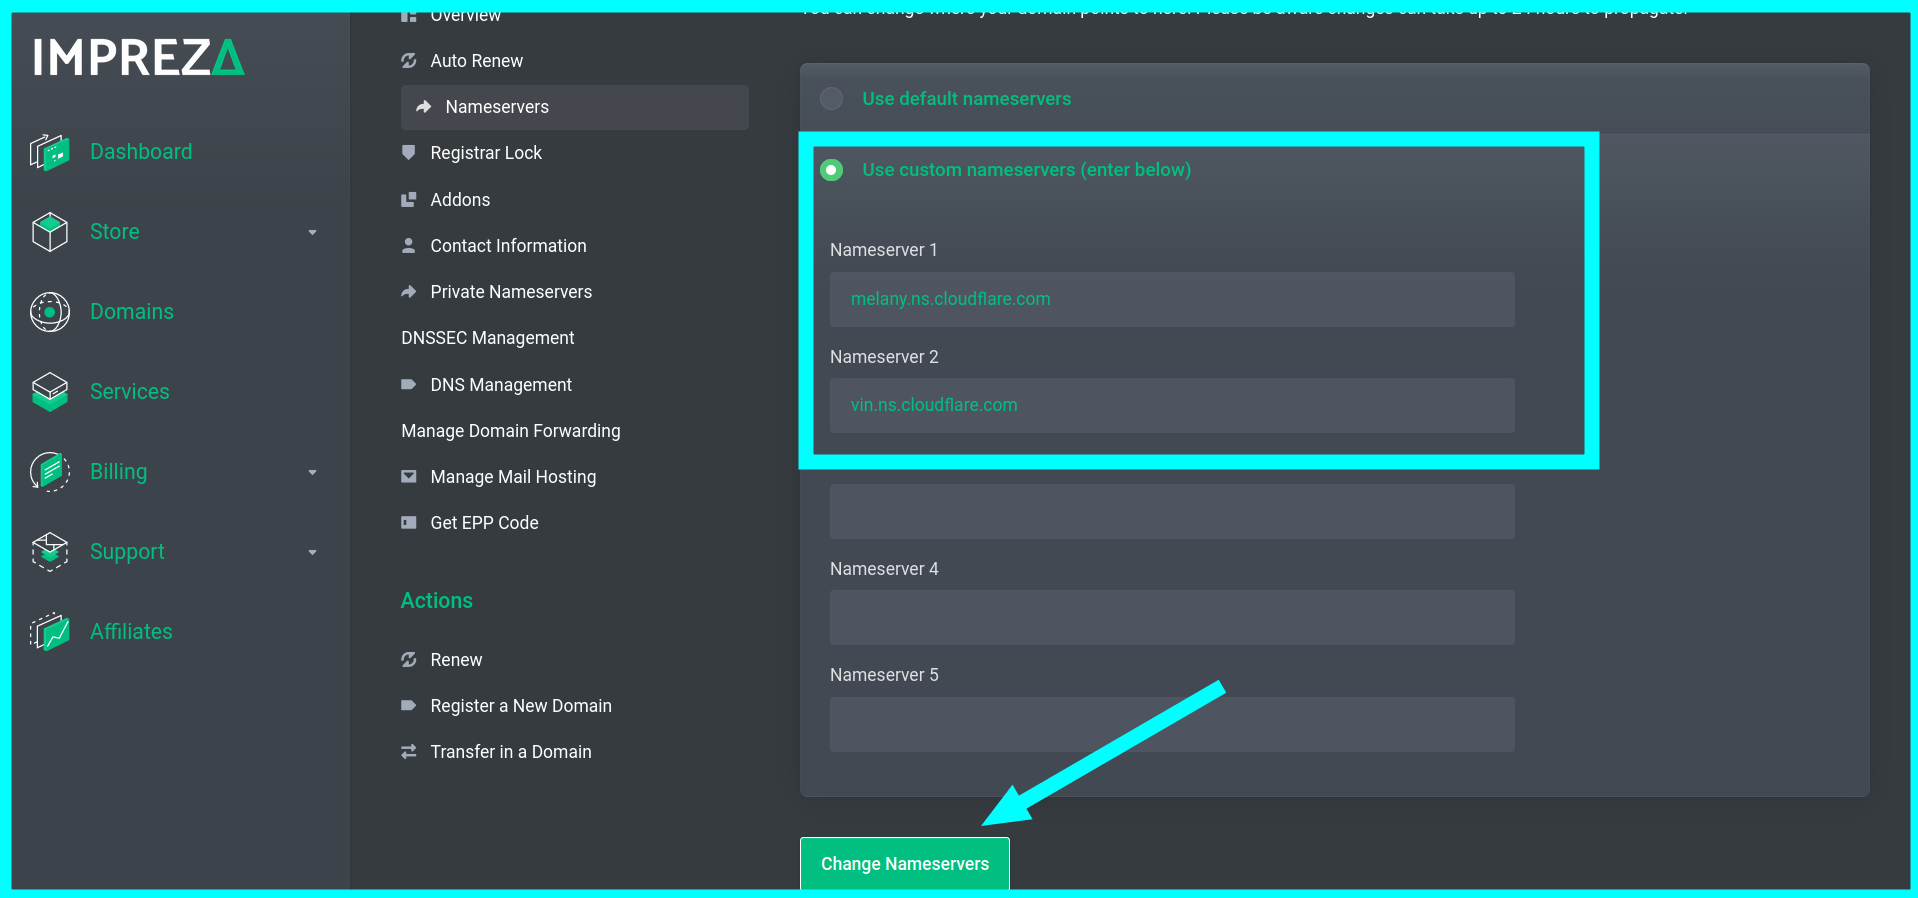
9. Click Use custom nameservers (enter below) and fill in the information you received in cloudflare and then click Change Nameservers.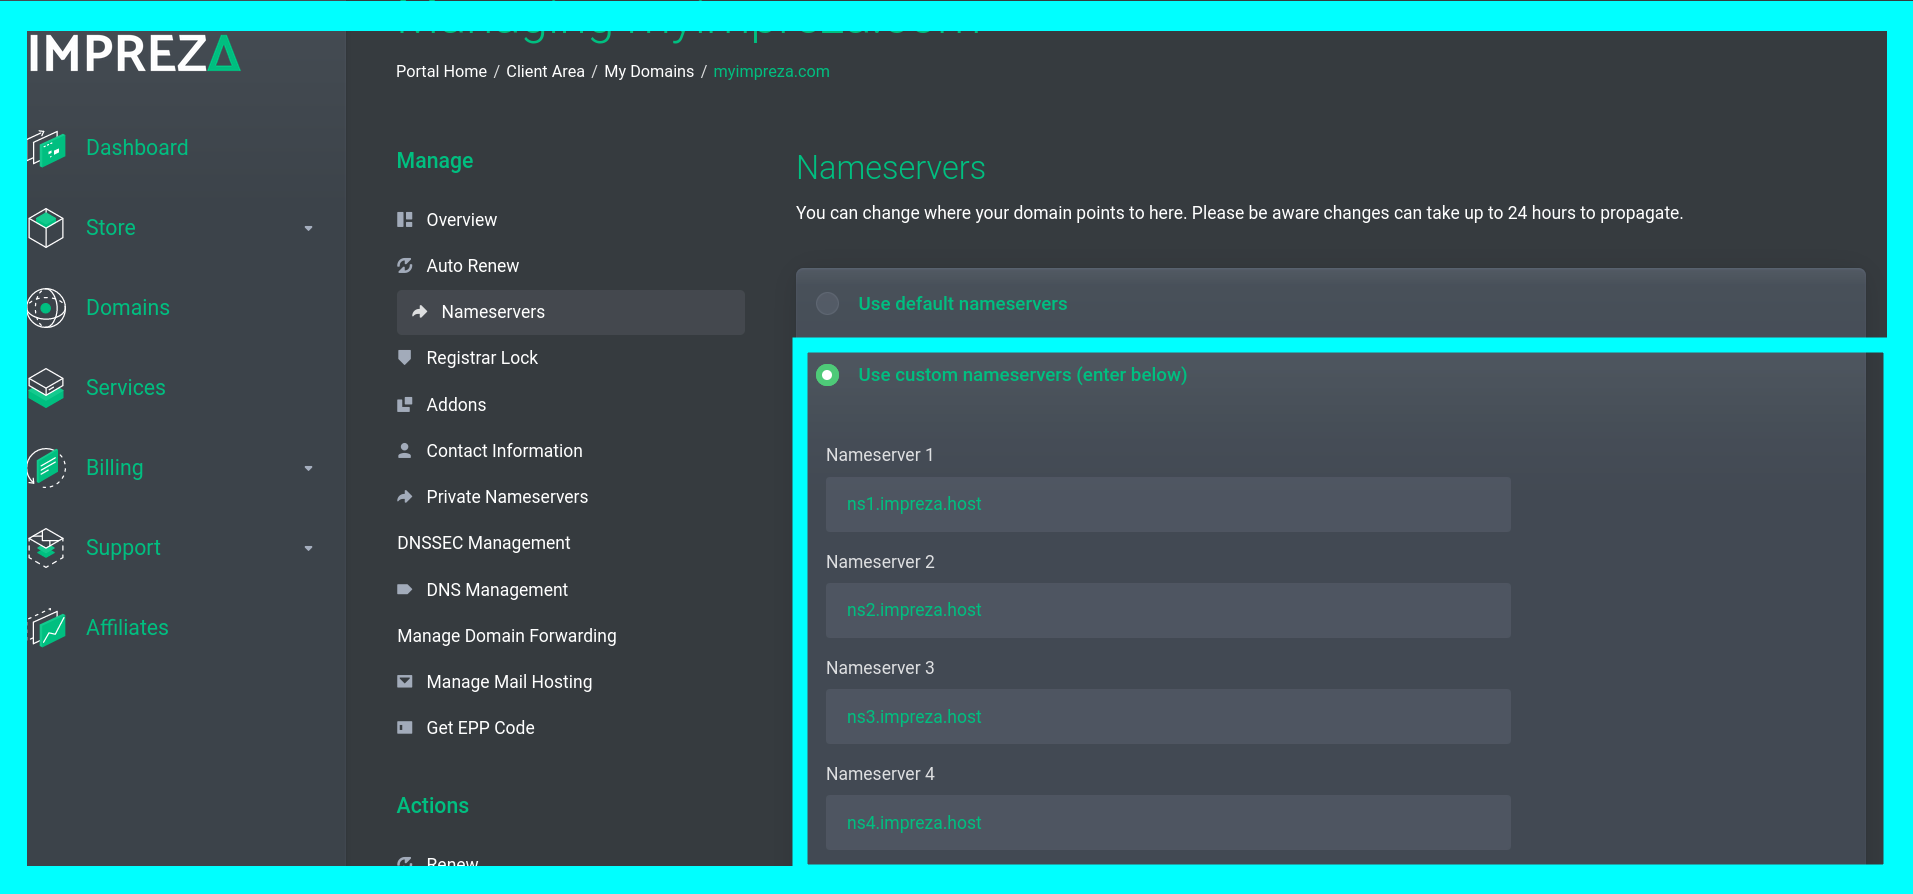
10. Return to the Cloudflare page and click on the Done button, check nameservers.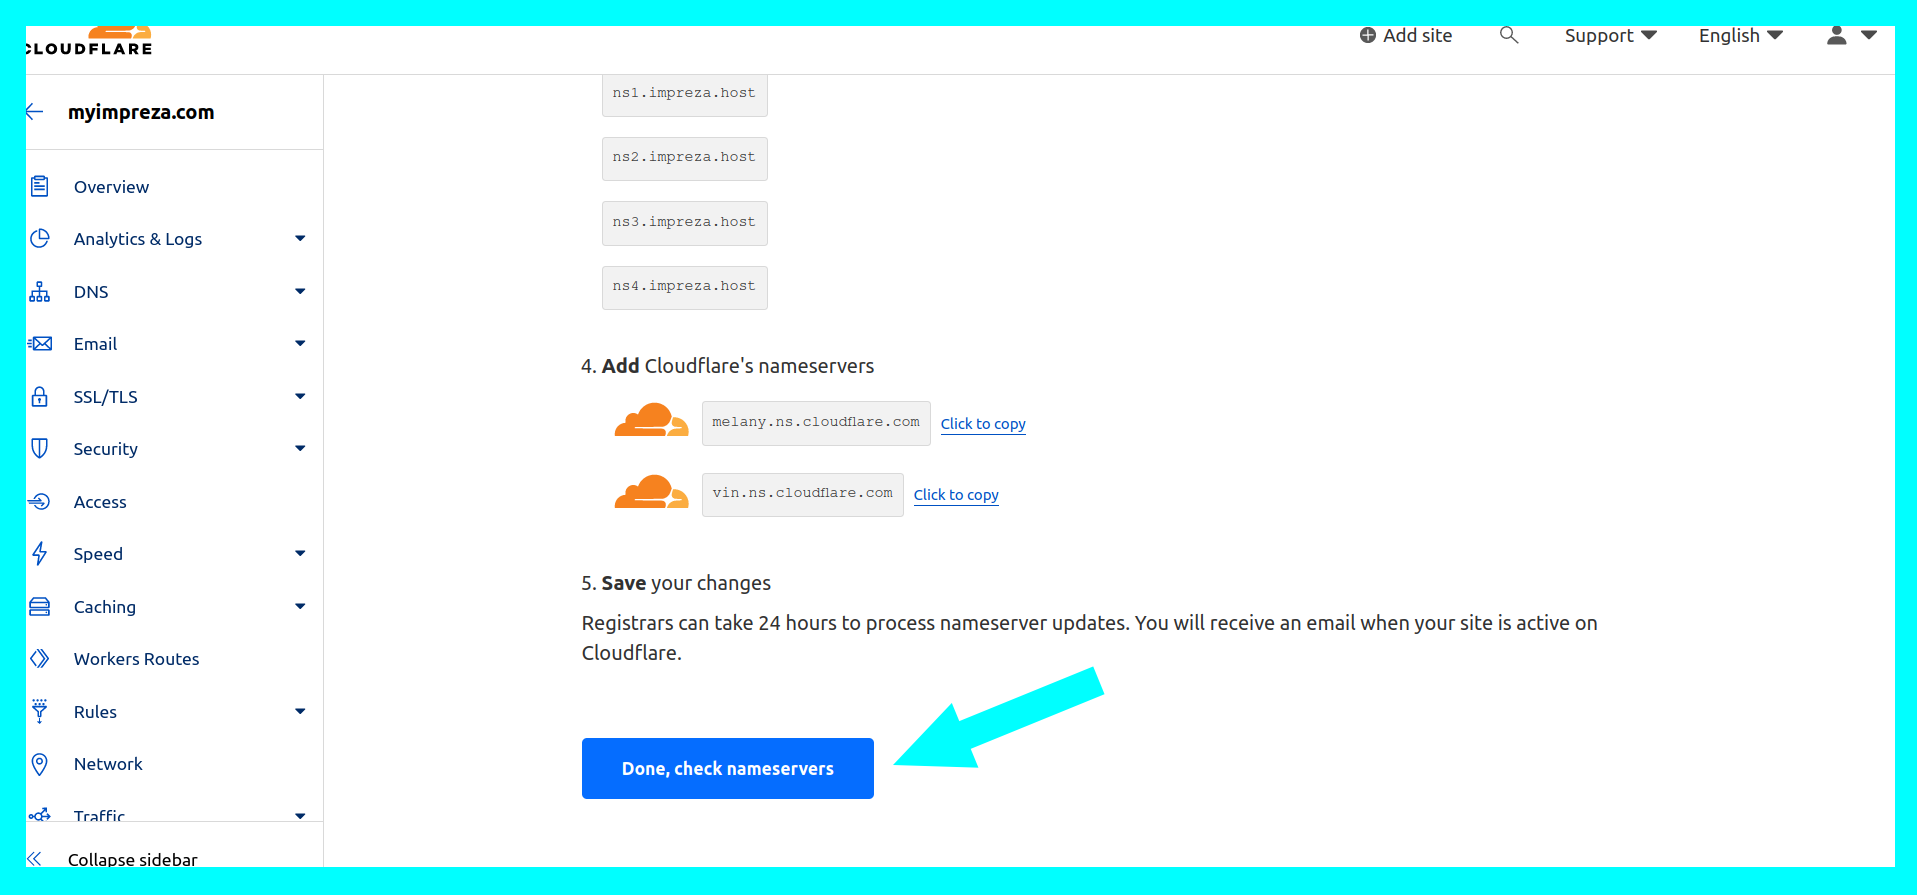
11. Follow the Quick Start Guide and click Finish.
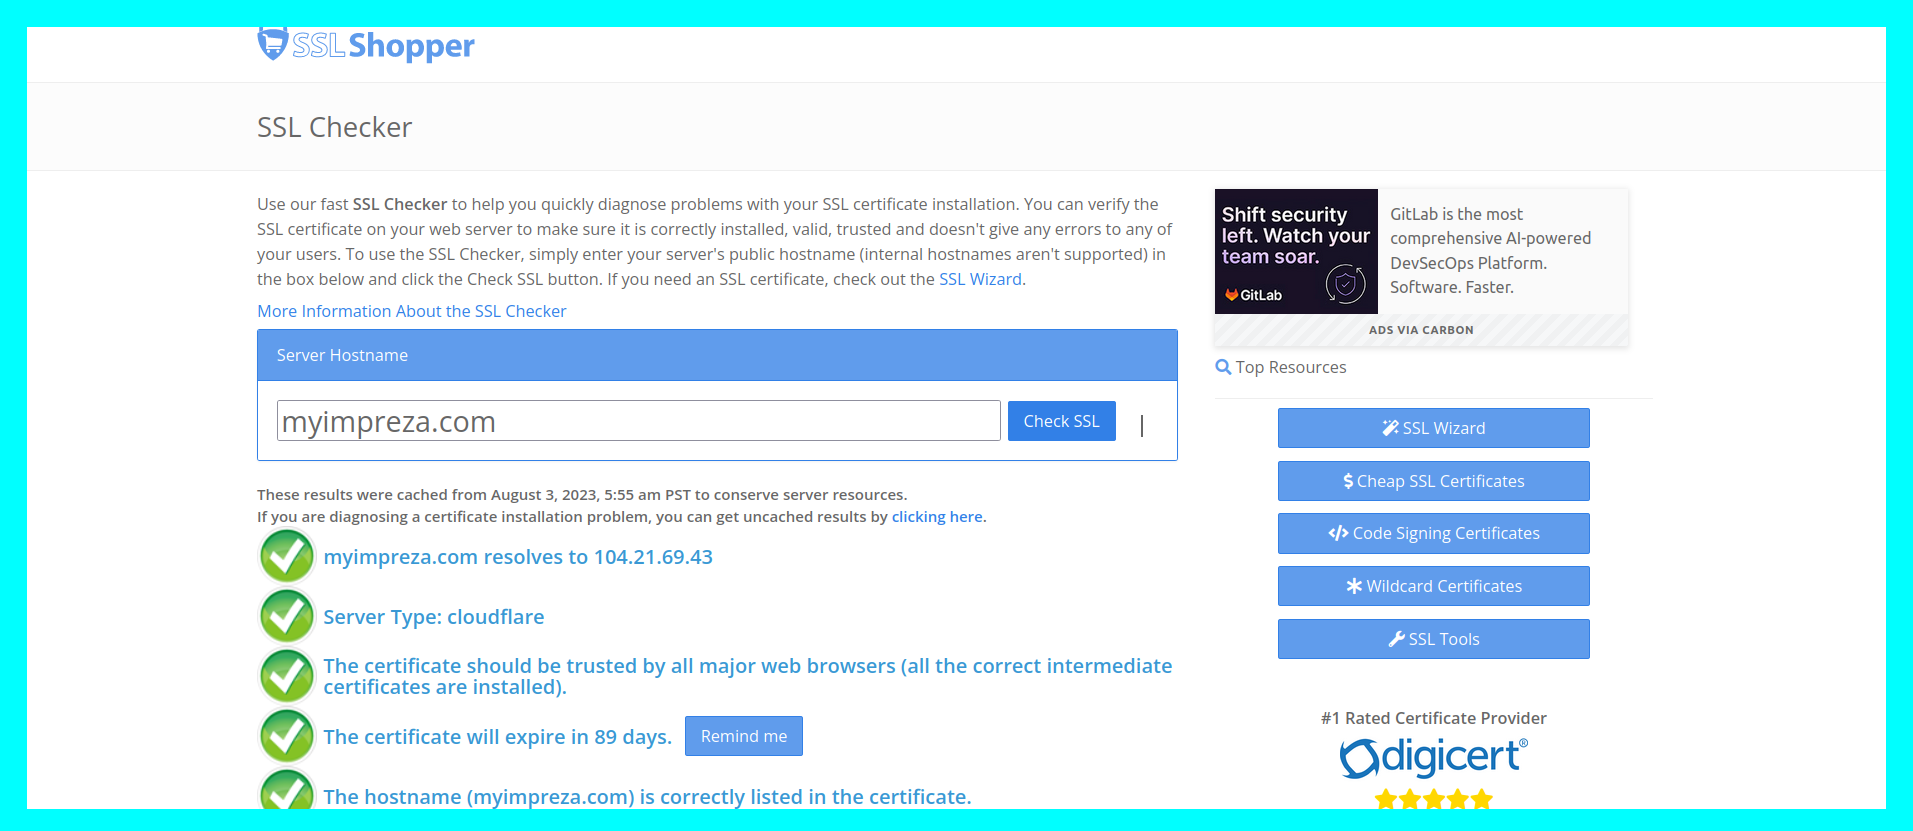
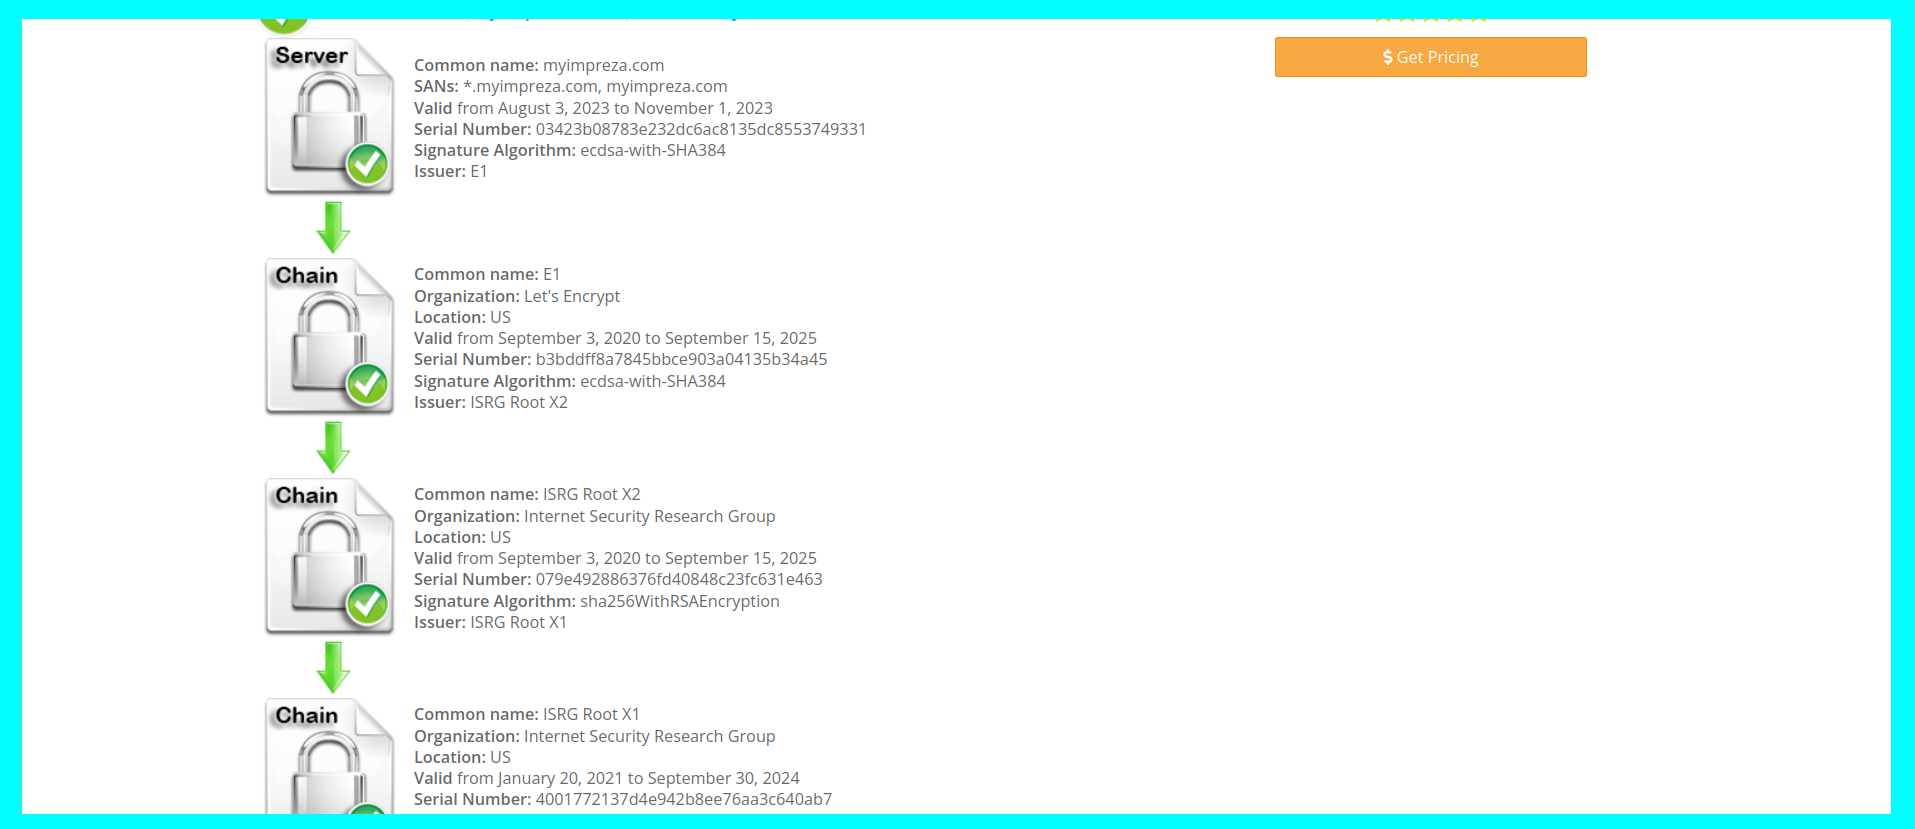
12. After waiting for the DNS propagation time, go to https://www.sslshopper.com/ssl-checker.html and verify that the certificate is working correctly.