Plesk is a commercial web hosting platform developed by Parallels. It is available for Linux and Windows-based operating systems and therefore for any operating systems offered by us.
Together with our partner Plesk, we are currently offering you Plesk Obsidian one month for free. Simply select one of the below-listed editions of Plesk Onyx and try it, before you buy and pay for it! Only available in combination with our VPS: Plesk Onyx now for one month for free.
 '
'
The current version of Plesk is version 18 (Obsidian) which we offer in three different editions:
- Web Admin Edition: This edition is targeted at users who only want to administrate their own websites. Unnecessary features such as customer/reseller management are not included in this edition.
- Web Pro Edition: With this edition, you can host up to 30 different domains. Also, all features apart from the reseller management are available in this edition.
- Web Host Edition: With this edition, you can host an unlimited amount of domains. There are no restrictions on behalf of Plesk. The Web Host Edition is the most extensive of all Plesk editions. It includes every feature - from reseller management over security core features to automatic outbound spam protection.
This tutorial, however, is restricted to the basics you need to know. We will show you how to add domains, FTP accounts, databases, and e-mail accounts.
At first, we log in at our Plesk webinterface. To do so, we use the browser and type in our IP address and port 8443 (e.g. https://198.51.100.3:8443).
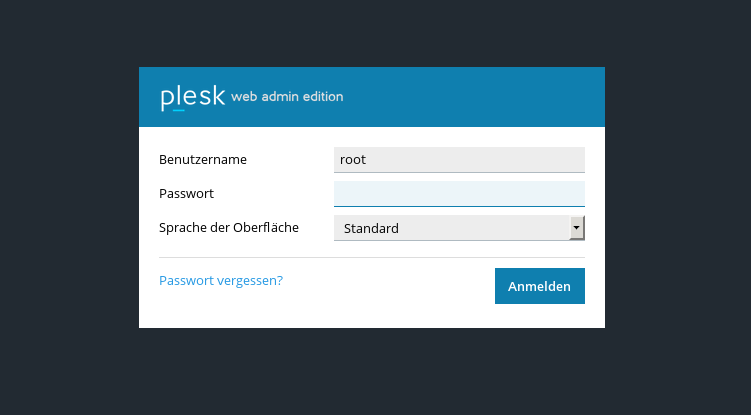
We log in with the login credentials we received via e-mail...
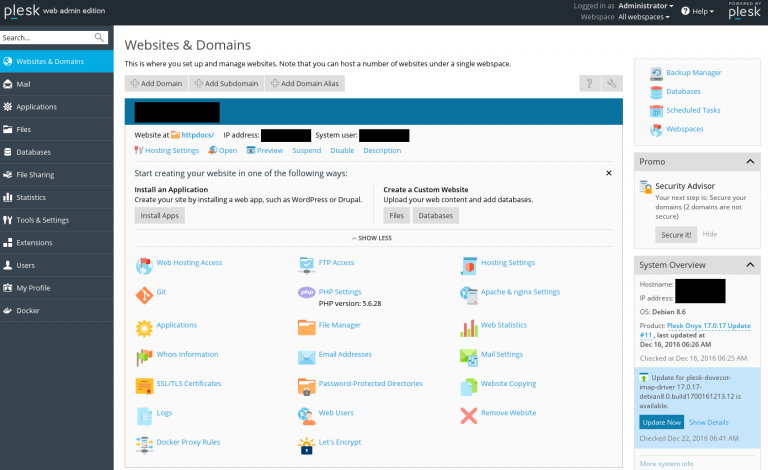
... and land directly on the main page of the Plesk webinterface. In our case there is already a domain added, in your webinterface the main page might look a little different.
Add a domain:
We click on "Add domain" on the main page and land on the following page:
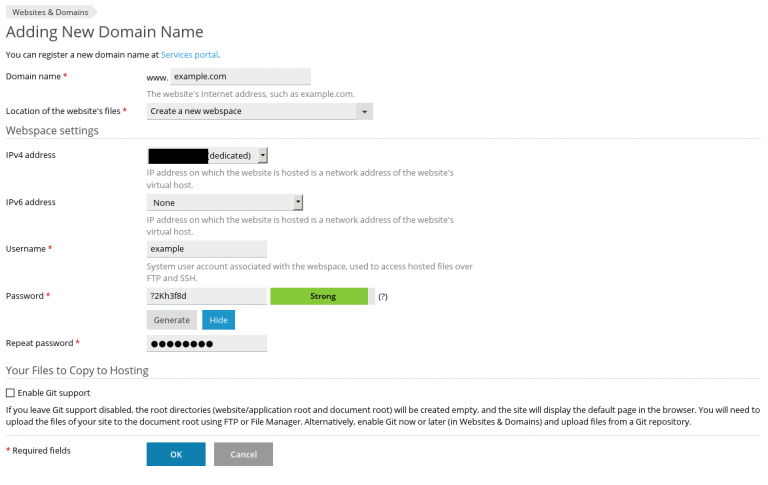
We fill in all the text boxes. In the box "Domain name", we fill in our domain (without "www"). Our example domain is "example.com". As a location for our new website, we choose "Create a new webspace".
When choosing IPv4/IPv6 addresses, we choose the IP addresses that we want to use for our newly created domain. Choosing the username and the password are, of course, completely up to you.
The first step is already done now. After clicking on "OK", the new domain is added to our server.
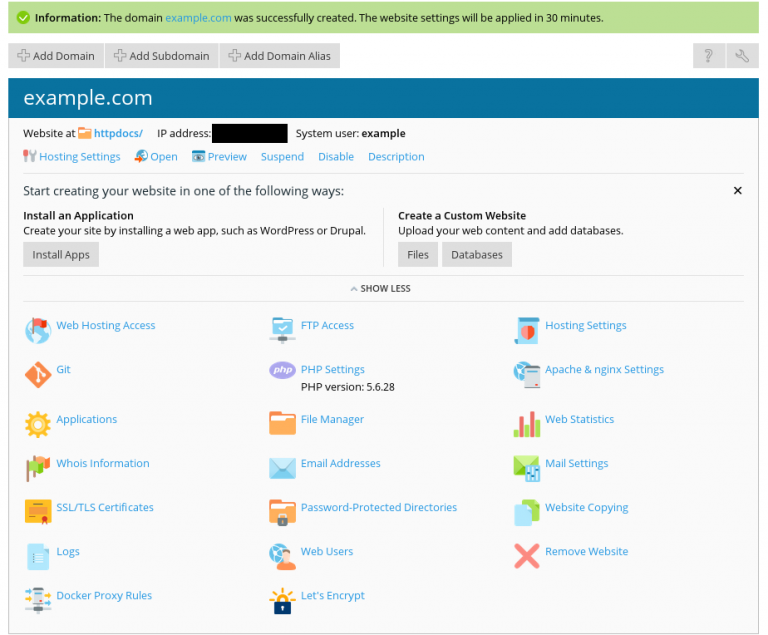
Now we can upload the data for our homepage to the server. Usually, this is done via FTP. Luckily, Plesk already created an FTP account for us when creating the new domain. So all we have to do is to open an FTP client of our choice (e.g. FileZilla) and connect with the login credentials we just set for our new domain.
What is missing now is a database for our website. By clicking on "Databases" and "Add database", we can create a new database:
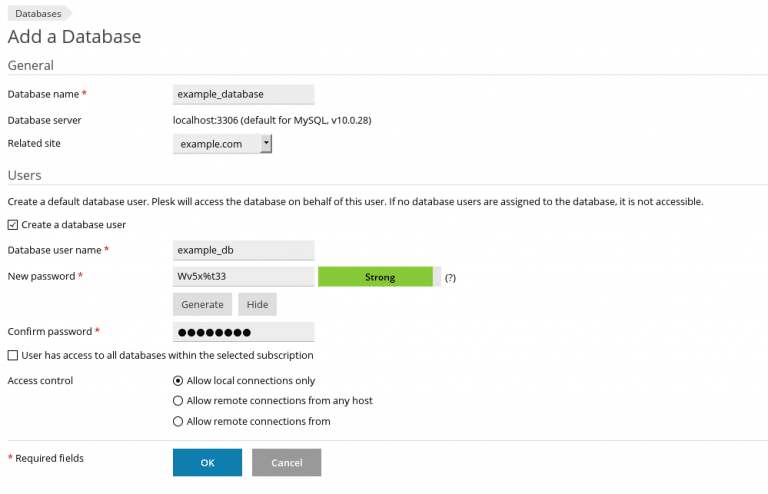
Again, we fill in all text boxes. To connect to that database, we have to create a new database user. Please note down its username and password, you will need it for your website later! When asked about access control, we chose "Allow local connections only".
After we created the database, the following screen will pop up:
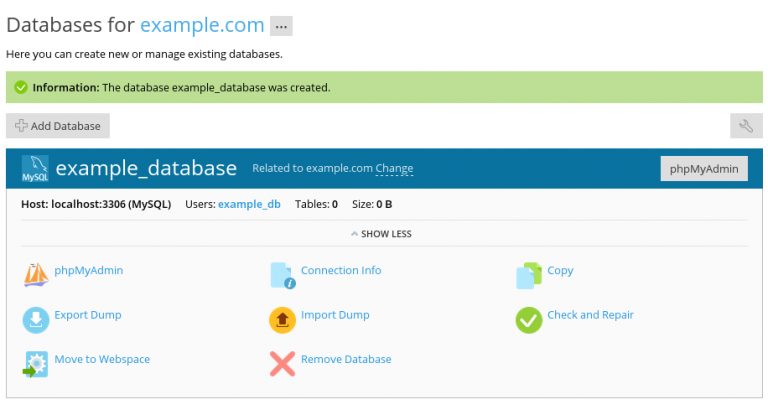
Here, we could also import a dump of an already existing database. However, this tutorial is limited to the basics only.
Create an e-mail account:
What we need now is an e-mail account for the domain we just added. Plesk offers a comfortable way to do so as well. We click on "Mail" on the left side of the main menu and then choose "Create Email address":
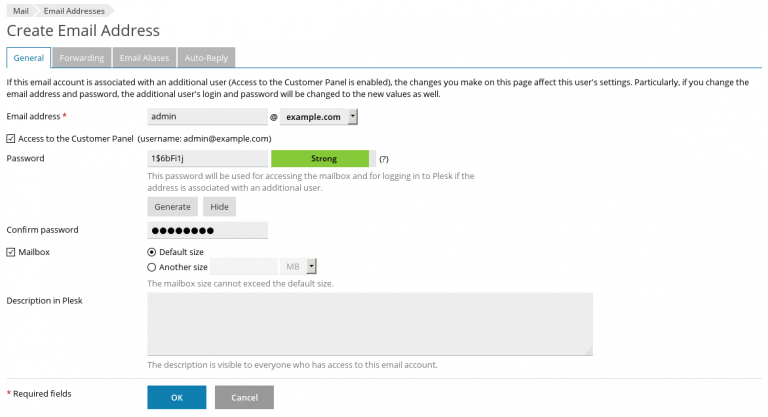
After we filled in all the text boxes we clicked on "OK" to create the new mail account. Please remember to note down the access data, you will need them later!
Once the mail account is created, we can log in on our mail webinterface on "webmail.example.com" for sending and receiving e-mails.

Sounds good to you? Great
