In Plesk Obsidian, which we offer for our VPS and dedicated servers, you can comfortably manage your WordPress sites with the extension "WordPress Toolkit". The software enables you to set up a new WordPress site with only a few clicks, it can find already existing WordPress installations on its own and it will show them all in a list. There you can do administrative tasks like updating, installing plugins, and much more on all installed WordPress instances at once. Therefore, the extension is very interesting for resellers but also end users. The WordPress Toolkit is available for all three Plesk Obsidian versions at no additional charges, but the range of functions in the Web Admin Edition got reduced in some points. For more information about the differences between the full version and the special Web Admin edition, please take a look at this site: https://www.plesk.com/extensions/wordpress-toolkit.
You can easily check if the extension has already been installed in your Plesk by changing to the following oversight: Server Management > Tools & Settings > Updates and Upgrades > Add/Remove components > Plesk extensions. You should see a green tick next to the extension "WordPress Toolkit". If there is still a red X shown, please use the "Install" function in the drop-down menu. With continue, you will proceed with the installation. You will find the extension afterward below the menu item "Server Management" in the main menu of Plesk. It is called "Wordpress" there. In case you can not find those menus, you can also use the Plesk search bar. Maybe you are not using the Service Provider view then.
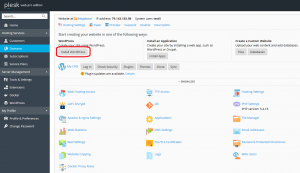
Here you can see a screenshot of the available options. You can increase the size of every image in this tutorial by clicking on it.
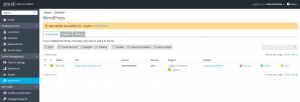
You can use those options selectively or on all WordPress instances at once. We will now explain those options from the left to the right.
- Scan
There you can search for existing WordPress installations. They will be added to the list below automatically. - Check Security
There you can check your WordPress instances for elementary security problems. You will get a list with points that got checked and possible automatic improvements you can confirm. - Plugins
You will get a collection of the installed plugins and also an update check for those plugins will be performed. You can install and remove plugins for your sites there as well. - Themes
There you can manage your themes and exchange them for multiple WordPress sites at once. - Update
You can update your WordPress installations to the newest version here. Plugins are not touched. - Check for Updates
Here you can check if there are WordPress updates for your sites. - Auto-Update
There you can decide if your WordPress sites should get automatic updates in the future.
Additionally to those features, you have the functions Clone and Sync available in every line with an existing WordPress installation.
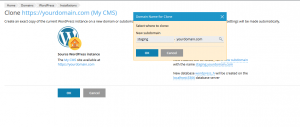
With Clone you can save a lot of time if you want to use a fully configured WordPress site as a Template. You can also easily change the URL of a WordPress installation this way by deleting the original site afterward. After clicking on this function, you can do the few required settings and create the target subdomain or select one of the existing domains.
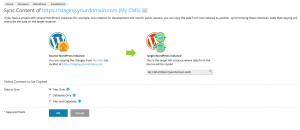
With Sync, you can copy changes to other WordPress installations. This is useful if you want to test for example new plug-ins on a subdomain before you use them in your public blog. You have the choice between the files, the database, or both.
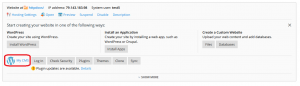
If you want to install a new WordPress for one of your domains, you have to change the menu. Please go to "Hosting Services" and then to "Domains". If it does not exist yet, please add your domain now and open it in the list with all the available domains by clicking on the name of the domain. Next to the usual options, you can see the new one called "Install WordPress", as shown in the image below:
After the installation, you can directly log into the WordPress administration panel from Plesk. If you need the login data or want to change it, you can find this and further options in a dedicated management menu. To open this menu, please click on the name of the WordPress instance left to the direct log-in button. We marked this in the picture below: