Pentesters/ security researchers use many devices for testing their hacking skills or finding new bugs in any web application. Most users use Linux in different flavors for testing purposes. But mostly Kali Linux is the most popular OS which is used by pentesters. We will show you a method to change any Android device into a pentesting or hacking device.
BEFORE ROOTING ANY DEVICE WE NEED TO UNDERSTAND THE BOOT PROCESS OF ANDROID:-
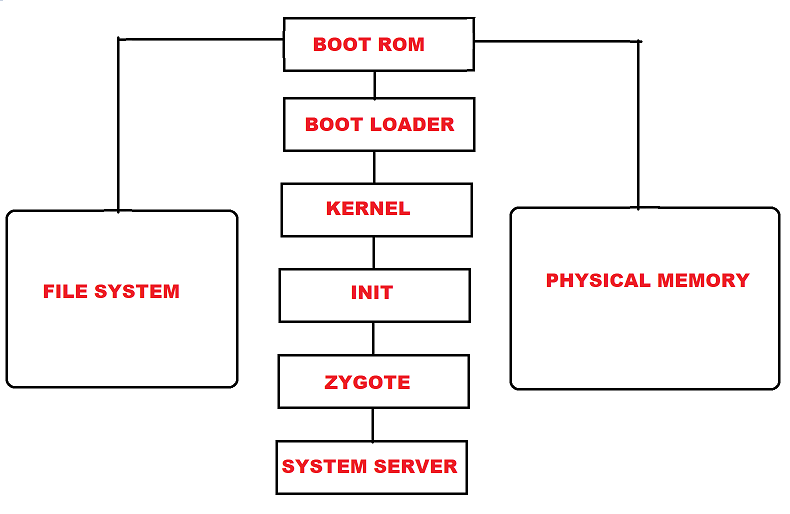
- Boot ROM – This is the initial phase of the booting process which runs on startup. Boot ROM starts its process from a defined location. Then boot ROM executes the boot loader.
- Boot Loader – The Bootloader contains information to find the system kernel. Boot Loader executes before Android OS. Boot Loader detects RAM & loads program to run the kernel.
- Kernel – Once Kernel boots, Kernel executes in memory to load drivers & initializes the process table. After finishing the system set up by the kernel.
- Init – Init is the first process that runs script /init.rc. This script is responsible for the initial setup of the system. Init setups all services related to Linux system boot.
- Zygote – Zygote boots with system. When Zygote launches app_process it creates Dalvik VM & calls Zygote main() method. It triggers a fork & creates a clone of itself. It creates an exact clean Dalvik VM with preloaded classes & resources. Zygote enables it code sharing accross Dalvik VM to consume the startup time.
- System Server – Zygote loads all the required Java classes. The system server loads a native library known as android_servers. Android server provides interfaces to all functionalities. After setting native services, the Android server will create a thread that will start the remaining services in the system. Each service will run a separate Dalvik thread in the system server. Once system services are running. Android will complete its boot process.
- Activity Manager – In the last activity manager will launch the home screen with apps & icons.
INSTALL KALI LINUX ON ROOTED ANDROID MOBILE.
REQUIREMENTS:-
- Computer running Windows 7/10
- Tools – Odin for flashing ROMs
- Mobile – Samsung Galaxy Grand Neo Plus I9060
- Rooting – Kingoroot PC Version
ROOTING SAMSUNG GRAND NEO PLUS:-
- For testing, we will use the Samsung Grand Neo Plus I9060. Before installing we will root the device.
- There are various methods of rooting Android devices. Most users use automated ways to root Android mobiles or tablets which are taught in mobile hacking courses offered by iiCyberSecurity.
- We have tried popular applications like Kingoroot. However, the app failed to root the device. So we tried using the Kingoroot PC version. Download Kingoroot from: https://www.kingoapp.com/
- Connect your mobile with a USB cable. Kingoroot will automatically detect your mobile. As you have installed Samsung drivers. Kingoroot will automatically detect your phone & ask you to root your device.
- Click on root and Kingoroot will root the device.

- After rooting install Root Checker app & you can see that the device has been rooted.

- After rooting, for installing Kali Linux. Download three applications :
- Complete Linux Installer – https://play.google.com/store/apps/details?id=com.zpwebsites.linuxonandroid&hl=en_IN
- Terminal Emulator – https://play.google.com/store/apps/details?id=jackpal.androidterm&hl=en_IN
- After installing all applications. Download Kali Linux images from: http://sourceforge.mirrorservice.org/l/li/linuxonandroid/Kali%20Linux/
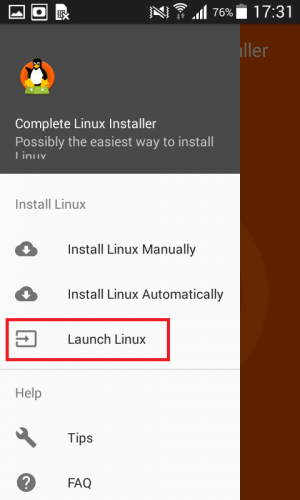
- Extract the image, and copy the image to an external memory card. Now open the Complete Linux Installer application. Go to: Launch Linux
- Click on the settings icon.
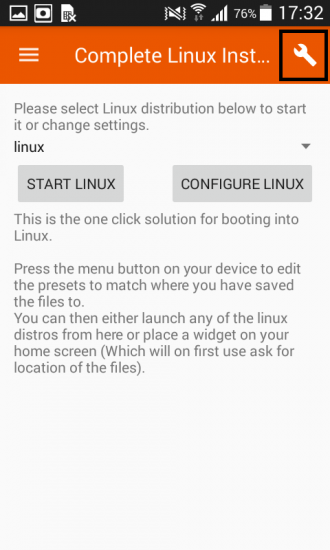
- Go to edit.

- Select the Kali Linux image.

- Then click on Launch Linux.

- As you click on launch Linux. Terminal Emulator will open for running Kali Linux.
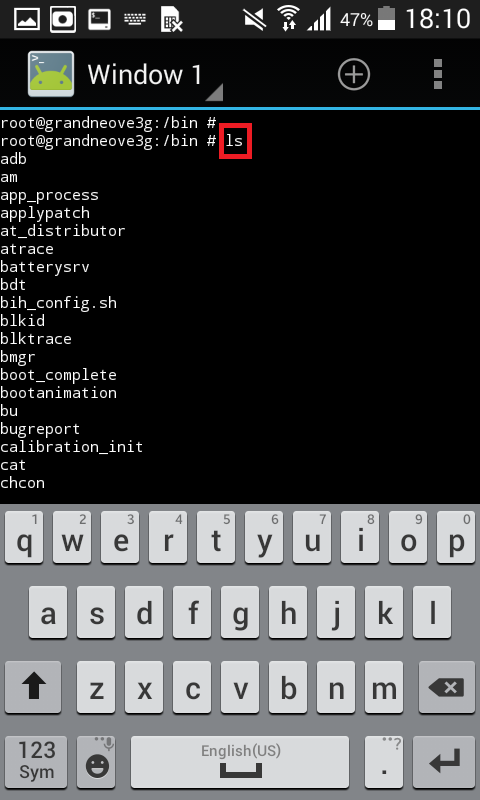
- Above you can see that Linux has started.
- This same process is the part of the ethical hacking course offered by the International Institute of Cyber Security
INSTALL KALI LINUX ON NON-ROOTED ANDROID DEVICES:-
KALI LINUX INSTALLATION –
- For testing, we have used Xiaomi Redmi Note 4.
- For installing Kali Linux without rooting your device. You need to download three Android applications.
- CommandBot ; https://play.google.com/store/apps/details?id=org.connectbot&hl=en_IN
- VNC Viewer: https://play.google.com/store/apps/details?id=com.realvnc.viewer.android&hl=en_IN
- UserI_And : https://play.google.com/store/apps/details?id=tech.ula&hl=en_IN
- After downloading all required applications. Open UserI_And.apk Here you need to configure UserI_And for using Kali Linux.
- UserIAnd provides various Linux distributions for installation. So we will continue with Kali Linux.
- Click on Kali Linux,

- Enter any username & password of Kali Linux & VNC password of your choice, we have used a distortion username. Make sure to enter a password between 6 to 8 characters for the VNC viewer.

- After that Commonbot will start. Here you have to enter the Kali Linux login password.
- Then type su
- Type sudo apt-get update. So from here only basic features will be accessible in Kali Linux. For accessing all the features of Kali Linux. You have to install all the required tools.

- For checking ip. You need to install net tools. For that type sudo apt-get install net-tools

- You can see that net-tools has been installed. Type ifconfig.

- The above screenshot shows the IP address of the local device. This shows that Kali Linux has been installed.
- Researchers at the International Institute of Cyber Security are trained to keep things on the go, like Linux on mobile.
INSTALL STOCK ROM RECOVERY IF THE ROOTING OF THE DEVICE FAILED.
REQUIREMENTS:-
- Computer running Windows 7/10
- Tools – Odin for flashing ROMs
- Mobile – Samsung Galaxy Grand Neo Plus I9060
- Rooting – Kingoroot PC Version
STOCK ROM RECOVERY:-
- For changing stock ROM. Downloaded ROM for Samsung Galaxy Grand Neo Plus I9060 mobile from: https://drive.google.com/file/d/0B5h2nhCP9mgaemRYLUdhNXN6XzA/view
- And flash ROM using the Odin tool. Download Odin from: https://odindownload.com/
- First, install Samsung USB drivers. Download the driver from: https://www.samsungusbdrivers.net/2017/02/samsung-galaxy-grand-neo-2014-usb.html
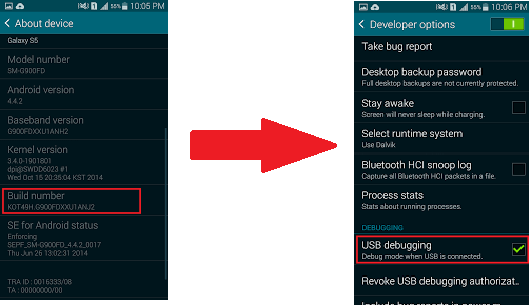
- Turn on debugging options. For that enable Developer options. To enable developer options. Go to < Settings < About Phone. Simultaneously click on Build Number. This will enable developer options.
- Then go to back settings. And head to Developer options. Open developer options & enable USB debugging.
- After that go to download mode by the below screenshot.

- It will open the download mode of the mobile.

- Then install drivers. After installing drivers make sure that your computer is detecting your mobile automatically or else install them below.
- https://www.samsungusbdrivers.net/2017/02/samsung-galaxy-grand-neo-2014-usb.html
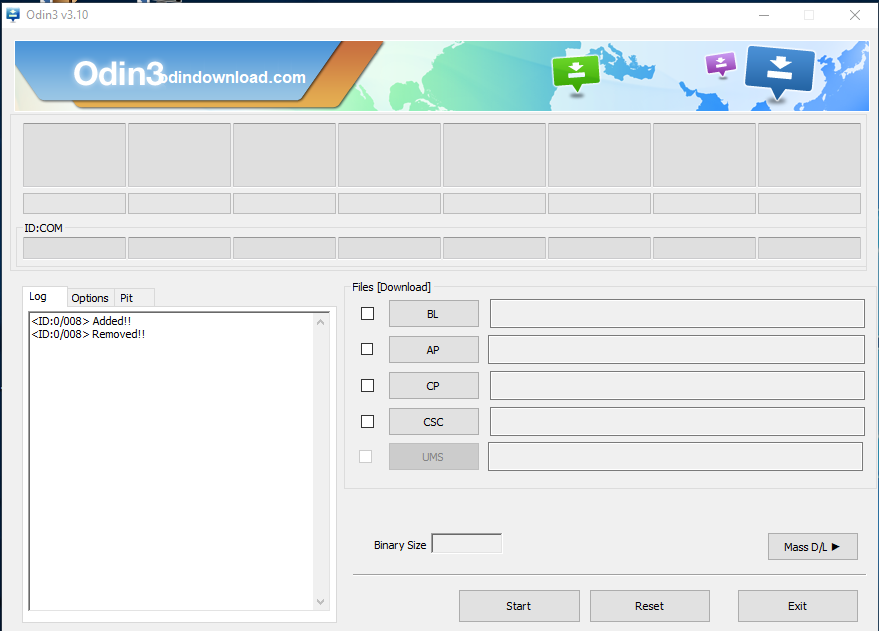
- Open Odin as administrator.
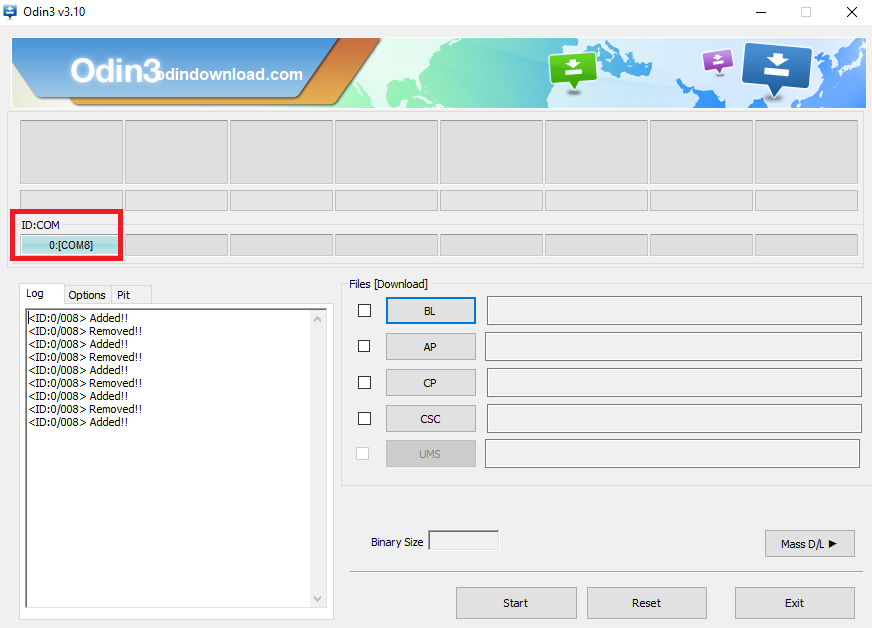
- Connect Your Mobile. As you connect your mobile. It will display under ID:COM
- Below you can 0:[COM8] means that the mobile has connected. It refers to the mobile ID.
- After connecting my mobile. Open BL, AP, CP, and CSC files in odin.
- BL – Bootloader is used to flash into mobile. As it holds information about the system kernel & has to execute before Android OS.
- AP – Application Processor – This area contains ROM which flashes into the device.
- CP – Core Processor – Here it acts like a modem for mobile. CP installs the required files for the device.
- CSC – Consumer Software Customization – CSC contains geographical region details, and carrier branding.
- browse and select all the above files as shown below:
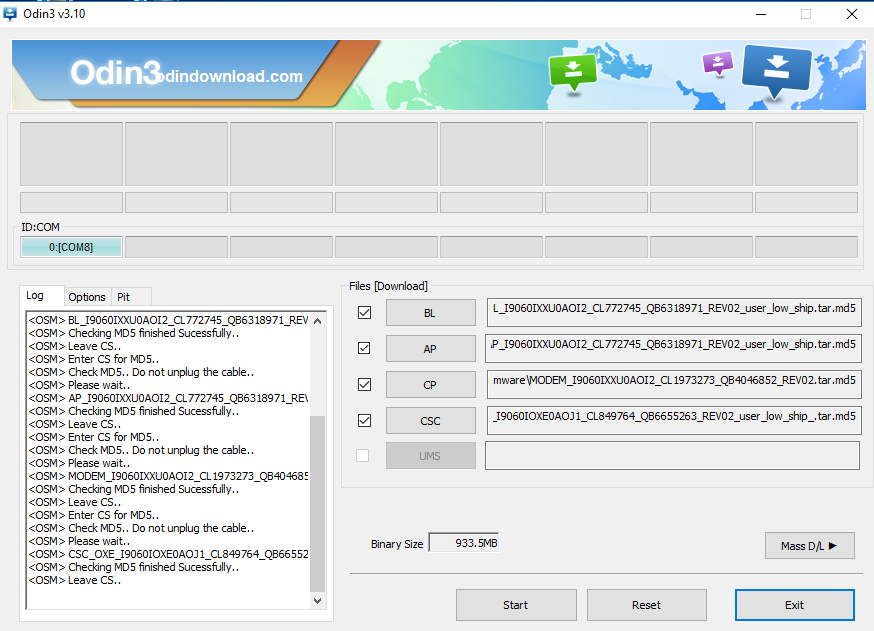
- Click on start. And Odin will flash the files into your mobile.
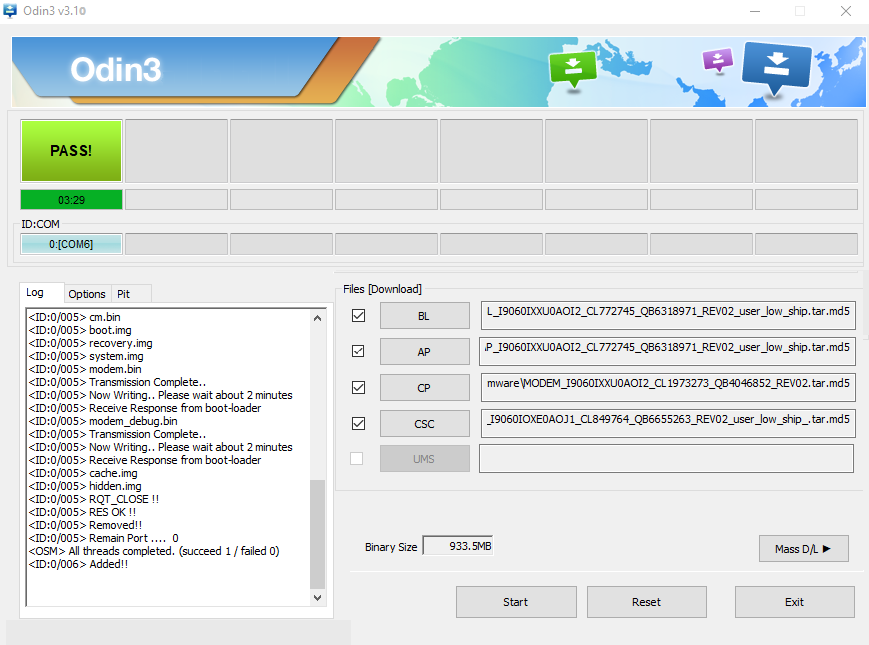
- The above screenshot shows that ROM has flashed into a mobile device. Now unplug your device & start by pressing the lock button.
